Showing posts with label Martha Stewart Punch. Show all posts

Saturday, March 18, 2017

Romping Bunnies

Follow my blog with Bloglovin


As I perused Splitcoast Stampers last week this card from Kittie747 caught my eye.  Over the years I have followed (stalked) Kittie - her work is so detailed, creative and outstanding.  After seeing her card I had to dig out my new bunny dies and get to work.  The frame is my favorite Spellbinders Floral Die that I layered with pop up for dimension.  My greenery is from an old but well used Martha Stewart punch (I am however going to buy the new IO foliage die I recently discovered).....the little flowers are an ancient small hand punch that I have had for at least 10 years.   


These adorable little bunnies are Cottage Cutz dies that I ran thru my cutter using beige card stock then I used some Ranger Distress ink and a sponge to color around them.  I dug out my smallest circle hand punch and gave these cuties an eye - using a larger circle hand punch I cut a piece of brown paper and layered it under the first cut - a little extra work but I wanted them to be precise looking.   Compared to Kittie I kept this card pretty simple but I am pleased with the results and cant' wait to put it in the mail for Easter.

Thanks for stopping by

Materials:  Spellbinders, MS punch, Card stock, Ranger Ink, Cottage Cutz Die

Saturday, August 2, 2014

3-D paper crafting

     Recently made my boss an Anniversary card for her husband.....it was such fun making it that I thought I would add one to my Etsy shop.  This particular one is for a 25th Anniversary - I love that I can personalize this style any way that someone may want.  I loved using my Silhouette Cameo to make this, literally everything except the flowers was print/cut with my Cameo - its a great machine that I am pretty sure can do even more if I could find a way to spend more time working with it.  Maybe now that I am partially retired I will get to play more.
     The outside of this box used an embossing folder - the lid of the box for my boss had her initials on it, all fancy schmancy looking!  We also used a picture on each side of hers - the left side had her wedding photo, and the right side had a recent photo of she and her husband, it turned out very nice.  Having used their personal photos on it I don't feel comfortable posting it to the blog, just trust me that it was lovely :)
   
     I will probably make some more of these for Valentines day.......already have one started for Halloween, its going to be spooktacular, bwahahahaha!
    Thanks for stopping by.

Materials:  Silhouette Cameo, Celebrate It Ribbon, Metallic card stock, cardstock, Martha Stewart punch,

Saturday, October 19, 2013

Santa nestled in the greenery

    Months ago I saw a card on Pinterest that fascinated and inspired me.  I had only recently purchased the Spellbinders Ornament die, but realized the shape of the card was nothing close to what I owned.  So the picture was filed away until recently when I decided I would just have to make my own background to replace die used in my inspiration piece.  Why own a Silhouette Cameo if you can't get creative.

     I designed my own shape for the easel background and then started playing.....I am in love with this sweet half moon Santa from Sassy Cheryl and I thought he would look great.  However, he just looked SO plain sitting on the ornament - next thing you know I drew upon my inner Kiitie Caracciola  (oooh I love her work - you can check out her gallery here) and out came the Martha Stewart punch, some snowflake dies, blinginty bling and soon Santa was nestled amongst the greenery with snowflakes falling.  I do have to admit that at one point I had to tell myself 'step away from the bling' as I was afraid I might be getting to carried away.  Below I have posted the inspiration image and a second card I made using this same easel background I created and the Spellbinders Ornament die.....it amazes me how changing things like paper, and images can make three very similar cards look so different.

This is the inspiration piece, now watermark can't remember who did it, but they are talented. 

This is my second card using the shapes from my first one at the top of the page. 
     Just love how both of my cards turned out - beginning to look a lot like Christmas around here.  I have about 13 ornaments painted and finished and ready to go.  Thanks for looking. 

Materials:  Silhouette Cameo, Spellbinders Ornament Die, Bling, Martha Stewart Punch, Designed2 Delight Digital, Sassy Cheryl Digital, Designer Cardstock, Copic Markers, IO Snowflake Die

Challenges:  Just myself :)

Sunday, July 14, 2013

Bloomin' Fun


     Oh yeah - still loving my Silhouette.  A co-worker requested a Retirement card for her mother.  I wanted to do something a little different. The flower pot and insert were purchased from Silhouette and are designed by Lori Whitlock.  While the flowers she has with that file are nice, they are just a little too one dimensional for my taste.  So, fortunate for me I had another file I had purchased (also by Lori) for a 3-D flower.  These were much more suited to my needs and with the click and drag of my mouse I was able to take her large flower, and scale them to the size I needed. Oh the joys of the Silhouette.  After cutting my flowers I used my stylus to shape them and bend the edges....then I layered them together and added some small glass beads to the center.  They flowers didn't quite fill the space, which was fine I wanted it to look like a pretty busy pot of flowers, so I added a few flowers from Recollections. Then I die cut a few leaves and shaped them, as well as punching a few pieces of greenery from a Martha Stewart leafy punch.  Then I adhered them to the background piece - on some of the pieces I used my Collal glue to keep the leaves raised.

      I assembled this pot, and then used my Silhouette to type a sentiment, and print and cut it to the size I needed for the inside. Adding to the reality of this bouquet I placed a little 'lady bug' in the corner.  Of course this card is a little thick with all those sweet blooms so I handcrafted a box to put it in with a belly band around the middle. My co-worker was pleased.

Supplies:  Silhouette Cameo, Lori Whitlock Designs, Recollection Flowers, MS punch, Button, Glass beads, Embossing folder, Ribbon, Collal glue. 

Challenges:  One Stop Craft Challenge - Summer Colors, Word Art Wednesday #88

Thursday, June 27, 2013

With Sympathy

     Yes, I needed a Sympathy card for a co-worker.  Her father passed away very unexpectedly the other night.  It was with sadness that I sat to create this for her.  While looking for inspiration I found several card styles that appealed to me.....most cards of this nature seemed to be fairly simple.  There was one card I came across that had used the Lords Prayer in the background - then I looked through some of my old creations and some ideas began to form.  Like most cards, this ended up a little different from how it was intended to look, and that is a good thing - I liked my original ideas, but this turned out even better.
    Not owning a stamp with the words to the prayer I computer generated them, repeating them about nine or ten times.  After choosing a paper color I then coordinated the color of the ink for the words to the paper. Once they printed out I used my circle Spellbinder die to cut out the image and a background layer.  Then I inked up my Penny Black floral stamp with some Brilliance Pearlescent Jade and stamped it over the words of the prayer, Cutting off a small side of the circles I placed them on my card and created a floral design on the opposite side to balance the card with some Prima flowers, and foliage with my Martha Stewart punch, and Cheery Lynn die.  To finish this off I used some ribbon from Really Reasonable Ribbon and a metal die Cross from Momenta.

  The card dimensions are 5.5 by 5.5 and with the flowers would not fit into a normal envelope, so I made a small box to place it in.  There is a belly band with a fancy punched edge, with another Martha Stewart Punch, and matching ribbon from the card to go around the box, topped with a frame stamp from Our Daily Bread Designs with their matching die.  (Need to place her name on this)
     It is a very peaceful looking card - inside I computer generated the sentiment: Although its difficult today to see beyond the sorrow, May looking back in memory help comfort you tomorrow.  You and your family are in our thoughts and prayers.

Supplies:  Prima Flowers, RRRibbon, MS punches, Spellbinder Die, Cheery Lynn Die, Our Daily Bread die and stamp, Brilliance Ink, Computer, The Paper Studio CS, Momenta Metal Tag. 

Challenges:  Simon Says - Anything Goes, Word Art Wednesday - Anything Goes, Wednesday Creative Inspiration Challenge, A.R.T. Challenge Blog, Anything Goes

Monday, March 11, 2013

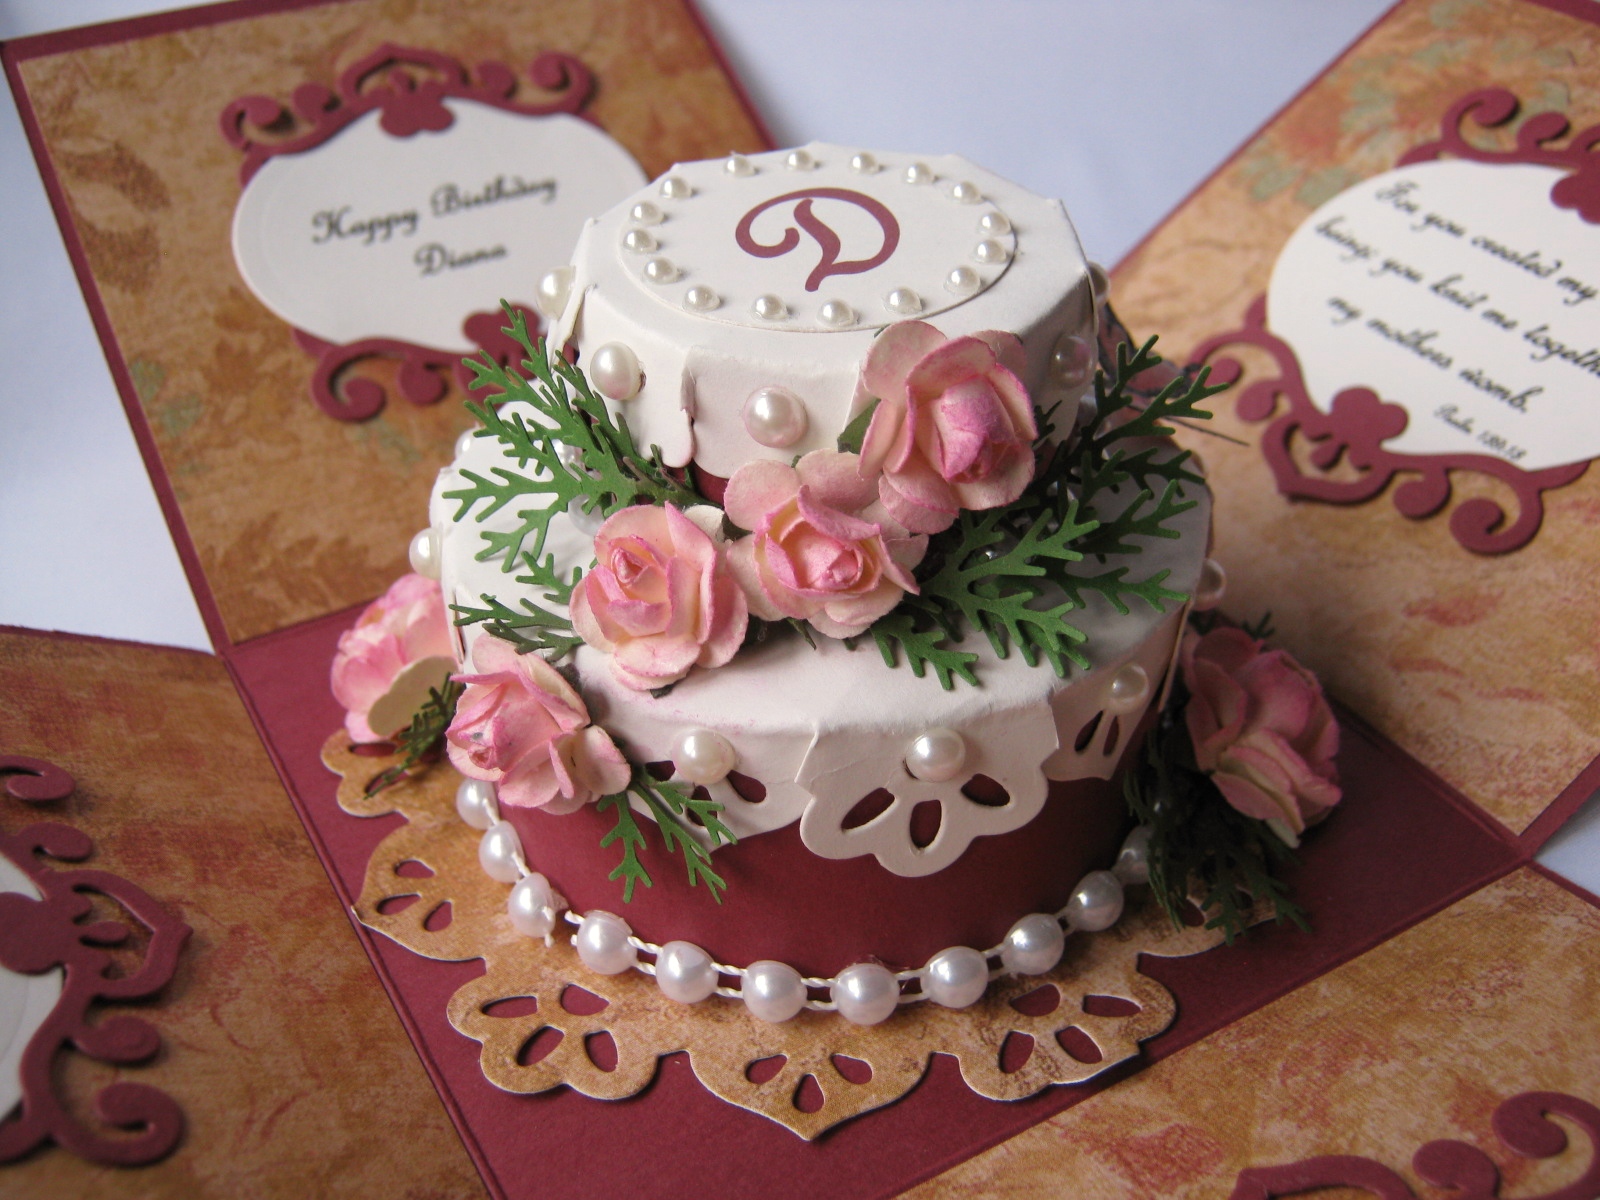
Low Cal Birthday Cake

     Had to wait to post this as my friend Diana's birthday wasn't until today.....didn't want to risk her seeing this before it got delivered.  We met during a Bible Study in Missouri - she is also a Weight Watchers leader, with many fine qualities that endear her to me. (There is a tutorial you can click on in my Nav bar  above on how I made the cake using Spellbinder dies) - The explosion box itself is from a 12 x 12 sheet of cardstock scored on each side at 4 inches.

     One panel wishes her a Happy Birthday and the other three contain scripture from the Book of Psalms


The outside of the box contains panels embossed with the corner Butterfly folder, layered on gold paper.


Supplies:  Spellbinders Dies, Martha Stewart Punch, Computer, Digi Sentiment, Recollections Pearls and flowers, Cardstock

Challenges: Stamptacular Sunday Challenge Dies, Oozak Challenge Anything Goes Spring (pushing it but hoping the butterflies and pink flowers qualify :))
01 09 10