Showing posts with label Cheery Lynn Die. Show all posts

Thursday, September 12, 2013

Three wee pumpkins

    This may not look like much but I am proud to say with the exception of the Cheery Lynn Die I used for the greenery the rest was TOTALLY designed by 'moi' on my Silhouette Cameo - Yep - you read that right.  I did not buy a cut file to do this -----nope------I drew each line, circle and oval shape (over and over in several cases)  on my own, from the box to the pumpkins.   I doubt Silhouette is going to ask me to become a designer for them, but I sure did learn a lot doing this.  There are some great designs available out there, but sometimes there is just a shape that you want and you don't want all the incidentals that come with it - and - if I wanted to sell anything from a cut file I have purchased, because it is for commercial use I would have to pay extra for the commercial right to do so.  I respect the right of those who have designed the files I have purchased.....trust me I didn't whip this out in a few minutes, it was a labor of love getting this all laid out and measured correctly to cut the right way.  It needs some tweaking but I sure am pleased by my efforts.
    Thanks for stopping by - if you have any questions please e-mail me.....in the meantime if you have a Silhouette play with it and have fun.

Supplies:  Cardstock, Silhouette Cameo, Grey matter, Cheery Lynn Die, Rafia, Chalk Ink

Challenges:  Flourishes shapes FLLCSEP13


Tuesday, September 3, 2013

A Savior is Born.....

    Once again I will say I just love my Silhouette Cameo.  This sweet and lovely poinsettia was cut on it from a Lori Whitlock cut file.  It is framed beautifully with a little extra greenery from my Cheery Lynn die as well.
     If you saw my previous post you may have read that it was a busy day in my Stamp castle recently.  I can be forgiven for thinking it is Christmas since I work in the retail world and as we ramp up for the holiday it sometimes feels like its already here.  I used my Spellbinders Radiant Rectangle die to create this in the same manner I created the one for the Halloween post earlier. The pages have Collal Silicone glue between them to keep them raised. The great thing about the poinsettia is I can make it ANY size I want using my Silhouette Cameo.  This whole card is no larger than 6.25 x 4.25 and has an easel stand I made with my own design on my Silhouette.  

    After making one in blue I just knew I would want one in red as well.  On this particular one I used my fave Krylon Gold Leaf pen around the edges of the outside of the red back.  Every time I look at these I make myself crazy - I think, "Oh I love the blue" - then I think, "Oh I love the red" - then I think "No I love the blue".  I swear each one is my favorite.  These to had to have boxes made to transport them in....still decorating those.  

     I have some more ready to assemble as I post this - think this will be a special Christmas card for some people close to me.  Not saying who, you know if you've been naughty or nice - just saying!!

Supplies:  Silhouette Cameo, Lori Whitlock File, Cardstock, Krylon Gold Leaf Pen, 

Thursday, June 27, 2013

With Sympathy

     Yes, I needed a Sympathy card for a co-worker.  Her father passed away very unexpectedly the other night.  It was with sadness that I sat to create this for her.  While looking for inspiration I found several card styles that appealed to me.....most cards of this nature seemed to be fairly simple.  There was one card I came across that had used the Lords Prayer in the background - then I looked through some of my old creations and some ideas began to form.  Like most cards, this ended up a little different from how it was intended to look, and that is a good thing - I liked my original ideas, but this turned out even better.
    Not owning a stamp with the words to the prayer I computer generated them, repeating them about nine or ten times.  After choosing a paper color I then coordinated the color of the ink for the words to the paper. Once they printed out I used my circle Spellbinder die to cut out the image and a background layer.  Then I inked up my Penny Black floral stamp with some Brilliance Pearlescent Jade and stamped it over the words of the prayer, Cutting off a small side of the circles I placed them on my card and created a floral design on the opposite side to balance the card with some Prima flowers, and foliage with my Martha Stewart punch, and Cheery Lynn die.  To finish this off I used some ribbon from Really Reasonable Ribbon and a metal die Cross from Momenta.

  The card dimensions are 5.5 by 5.5 and with the flowers would not fit into a normal envelope, so I made a small box to place it in.  There is a belly band with a fancy punched edge, with another Martha Stewart Punch, and matching ribbon from the card to go around the box, topped with a frame stamp from Our Daily Bread Designs with their matching die.  (Need to place her name on this)
     It is a very peaceful looking card - inside I computer generated the sentiment: Although its difficult today to see beyond the sorrow, May looking back in memory help comfort you tomorrow.  You and your family are in our thoughts and prayers.

Supplies:  Prima Flowers, RRRibbon, MS punches, Spellbinder Die, Cheery Lynn Die, Our Daily Bread die and stamp, Brilliance Ink, Computer, The Paper Studio CS, Momenta Metal Tag. 

Challenges:  Simon Says - Anything Goes, Word Art Wednesday - Anything Goes, Wednesday Creative Inspiration Challenge, A.R.T. Challenge Blog, Anything Goes

Wednesday, June 19, 2013

Love & Happiness.....

     I saw this layout and design posted on Pinterest by Jo Ham of Its My Creative World.  Can I just say she is one creative lady.  You may have noticed from several of my posts recently I have been making wedding cards for some friends.  It was while wandering through Pinterest one evening that I came across this beauty.  I CASED her work, changing the coloring some, I also changed  the sentiment and die it was printed on, and instead of  using a flower I chose some different embellies.   Jo designed this half round step card for use with a Silhouette, I just had to download it and try it on mine -- I love step cards and just couldn't pass up this great shape.
     There is a learning curve on the Silhouette and on this card I learned several lessons I thought I would share.  First, Jo said in her blog that after cutting and folding you would have to cut the excess outside edge, no problem.  My little experience with Silhouette has taught me that the dashed lines for folding can get a little worn and sometimes tear easily if you are too rough - it took me two tries on this card to get it the way I wanted it.  What I learned was that right after cutting those excess edges, take the time to then adhere the background while it is laying flat.  Playing around too much with my first one caused some stress on the fold lines. I also discovered that the pieces she included in the cut file for the background weren't really to size - while they fit the main circle, the edges of those change after you hand cut it......I am going to play around and see if I can change her pattern and save it.
     The image is from Mo's Digital Pencil -- ya'll know how much I love Mo's designs).  The lovely couple was colored with my Copic Sketch Markers....I also used my Gelly Roll Clear Star pen to give some sparkle to her gown.  I ran my Cheery Lynn small flourish die through my Cuttlebug about 4 or 5 times to create the embellishment behind the couple, the white background was also run through the Cuttlebug with a Valentines embossing folder. After generating my sentiment on the computer I lined up my Opulent Oval die over it and cut it out adding a darling little Dove from Jolees.
     Know that I fell in love with this card and was obsessed all day putting it together.  Using my Silhouette is still very new to me - it can do so much and I know so little.  If it weren't for great tutorials by ladies like Jo, and others I have pinned, I would be at a loss - they inspire me to practice, practice, practice using this fine machine as a tool in my paper crafting world.


Materials:  Silhouette, Mo's Digital Pencil, Copic Sketch, Spellbinders, Jolees, Cheery Lynn, Cuttlebug, Gelly Roll

Challenges:  Word Art Wednesday - Anything Goes
  

Wednesday, June 5, 2013

Spring into summer

     I was working on this image before vacation, and feel like I need her finished up with Summer around the corner.  This image so reminds me of my bestie Vicki.  We are complete opposites and often laugh about it.  I am an early riser, she hates mornings - I am ultra conservative, she likes to pretend she can be, but is much more liberal than I am - she loves to relax in her garden, I do not have a green thumb and look for reasons not to grow things.  When I saw this image at Mo's Digital Pencil I just had to click 'buy' and add her to my collection.

      For my inspiration today I used the Sketch Challenge 439 over at SCS shown above.  I turned my card sideways and changed the shapes up a little.  There are days that challenges like this can be great inspiration when your trying to finish projects up.  The original design was somewhat similar, but I am glad I let the sketch inspire me.

Materials:  Mo's Digital Pencil Image and Sentiment, Cheery Lynn Flourish Die, Spellbinders Oval Die, Corner punch, MME Paper, Copic Sketch Markers, Ribbon


Tuesday, March 26, 2013

By His Wounds

     During Lent a group of musicians and worship leaders from all across the South have posted a daily devotional on You-Tube - I have been following along daily.  They have actually been using material and readings from the Book of Common Prayer - which has been interesting as some have never used this book before and their insights into the scripture has been a breath of fresh air.  Just a click of my mouse and I can have as much time to mediate and pray during the devo as I need.  How exciting this week is as we travel through Holy Week into Easter......As I have said before, this season begins much earlier for me, at Christmastime.....you can't have the cross without the creche.  I am humbled by the sacrifice Jesus made on my behalf. It is with joy that I look forward to celebrating His resurrection this Sunday.

     I have had a great time making some explosion boxes for Easter and today I worked on a 'pop-up' card. Once again I went to my 'go to' stamp from Flourishes....this is the perfect size cross, and the Easter Lilies that adorn it are just beautiful.  I stamped, colored and then cut the cross out....I also stamped a second cross that I then cut the center Lily from and colored.  Using some scrapbook adhesives I popped this up on the cross.
     Using my circle dies (offset) I cut a piece of silver to place behind my image.  With my Cheery Lynn dies I cut some greenery to place around my cross.  An Easter sentiment was placed inside of my Elegant Oval Frames from Our Daily Bread Designs and cut with their matching Spellbinders die.  A little bling, because this is a festive and awesome day I am celebrating, and the inside of the card is complete.
     For the outside I used a larger Elegant Oval Frame from Our Daily Bread Designs with a sentiment from their 'He Will Rise' set.  I cut out and colored a lily for the corner of the die.  Keeping the cross in mind I ran the  front panel of my card through my Grand Calibur with their M-Bossabilities wood die.
     Time to be getting some of these in the mail - Easter will be here before I know it.


Supplies:  Flourishes Stamp, Our Daily Bread Design Stamps and Die, Cheery Lynn Die, Bling, M-Bossabilities, Copics. 

Challenges:  ODBDSCS148 He is Risen, Cheery Lynn 73 Celebrate, Word Art Wednesday Anything Goes

Wednesday, February 27, 2013

A little birdie told me...

     There is something very refreshing about black and white cards.......they always seem so fresh and crisp to me.  When I saw the challenge at Our Daily Bread Designs this week was for black, white or cream I couldn't help but get one of their stamps out and play.  I do have to confess that after taking this picture I decided to color the little berries red, then used a little crystal effects over them.  I liked the little pop of red after doing that.....but since the picture was taken I decided to go with it as is - you'll have to use your imagination.
     I used some ribbon on the bottom for this one, I like this design so I am planning to make a set as a gift and will use a lovely Thank You sentiment on the bottom. This is a great stamp from Our Daily Bread Designs and I love that it has a  matching die make - this makes  it soooo easy to cut it out and pop it up. Has me thinking spring!!   Also, in real life the rhinestones on the lattice really make this card look lovely.

Supplies:  Our Daily Bread Design Stamp and Die, Cheery Lynn Lattice Die, Spellbinders Circle Die, Rhinestones, Celebrate 360 Ribbon

Challenges:  Our Daily Bread Designs ODBDSLC144, Word Art Wednesday Challenge 69

Tuesday, February 19, 2013

Easter Explosion

     Where do I start.  Ever since I saw the "Explosion Box" made by Kittie C on Splitcoast Stampers I have been itching to make one.  I finally cleaned up my stamp area and sat down to play the other day.  THIS is not the first box I created.....that will be posted a little later so not to ruin a surprise for a friend.  After making the first box there were a gazillion ideas going through my mind.......something special for Easter just kept tugging at my heart....a box that holds a special gift reminds me of the great gift of Christ's birth at Christmas that culminates in the greatest gift of all when He dies on the cross so that I might live.
      While I wanted to use the acetate and have it look like there were things in the air as the box was opened, I just couldn't seem to grasp an idea for it - instead this is what I created!!  I used three different stamp sets.  The cross with a flower cut out and popped up on it is from Flourishes. From the get go I wanted a cross in the center and this one is the perfect size and can be cut out easily.  The 'Alleluia' sentiment is Stampendous, and the perfect scripture quotes, as well as the frame and matching dies used around the sentiments are from Our Daily Bread Designs.
     I started by taking a 12 x 12 sheet of cardstock and scoring it at 4 inches on each side, then I cut out the corner pieces for a + shape.  I got a little carried away on the inside layers, running one through my Grand Calibur with the Spellbinders M-Bossabilities to create a wood look, and backing it with a darker purple cardstock.
     For the outside I created my own patterned paper using the flower stamp from Flourishes.  I topped the box with a small bow made with my NEW Becca's Bow Maker I recently purchased from Our Daily Bread Designs (I think I am going to enjoy using this on many future projects).
     The focal point in the center was the most fun.  I colored my cross and flowers in with my Copics and then cut it out.  I took some mirrored silver cardstock and took two of my circle dies, placing them so they cut slightly larger to the top and ran them through my GC. I cut two of these so I could sandwich a piece of vellum between them and form a frame - the cross was too messy looking from the back and needed to be hidden.  Then I put some pop ups on the back of my cross and placed it on the vellum.  For the base I took a small styrofoam ball and cut it in half....I used a knife to make an indentation across the top to place my frame and cross in.  Some leaves cut from my Cheery Lynn die and a few flowers from my Martha Stewart punch were added to the top of some moss I glued over the styrofoam....I also added a few dollops of glue and put a little touch of Flower Soft on my moss.
     This project was just toooo much fun - I am hooked just wait until you see the other box and the one I am planning next....lets just say 'Yee Haw' for that one.  !

Supplies:  Our Daily Bread Design (Stamps, Dies, Flower Soft, Becca Bow Maker), Flourishes Stamps, Stampendous Stamps.  Martha Stewart punch, Spellbinders Dies and M-Bossabilities Folder, Copics, Cheery Lynn Leaves, Pop Ups.  Cardstock, Ribbon

Challenges:  Our Daily Bread Design ODBDSLC143, Paper Playtime CH #4 Use a Sentiment, Really Reasonable Ribbon, Spring Colors and Ribbon,  Hiding in My Craftroom #85 Embossing, Word Art Wednesday Anything Goes

Friday, January 18, 2013

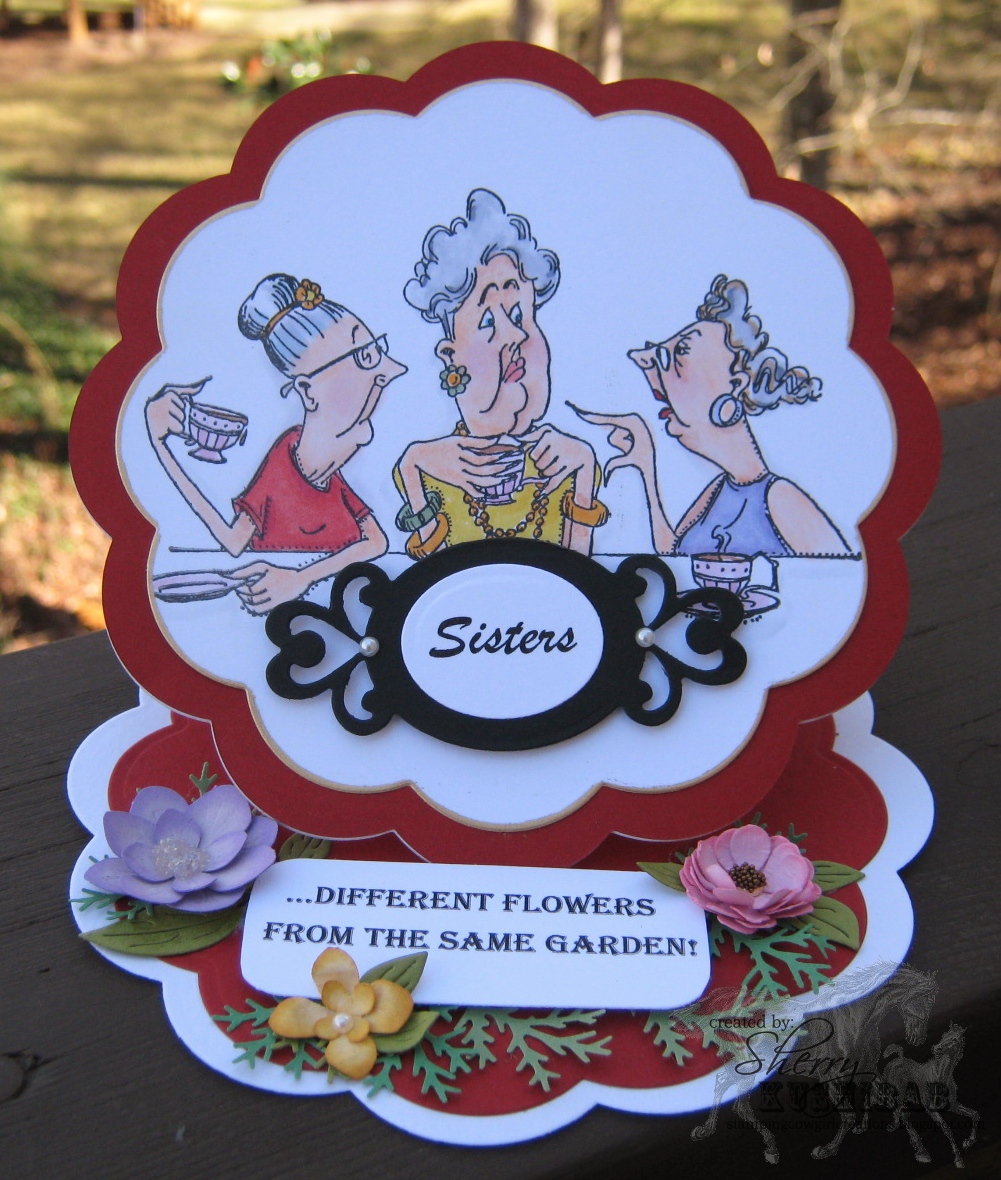
Sisters

     Yes, I am one of those crazies who "Pins" - it can be crazy addicting, but this card is proof that it can be inspiring as well!!  As I hopped from board to board of various "Pinners" I came across the above sentiment.
     I have two sisters, one older, one younger.......I have not lived near them in years but we have always managed to stay in touch and visit.  We have even done several 'sister trips' together over the years as well.  As I was coloring this adorable image by Art Impression a few weeks ago I couldn't help but think of my sisters.  We are sooo different, and yet we are only a phone call (and occasionally a flight) away from each other if the need arises.  I will have to admit that my older sister is known to be the 'control freak' between the three of us - so it is no surprise as I was coloring these ladies I imagined her to be the one with the finger wagging, setting us straight on some matter or another.
    So now you know why when I saw this saying I just HAD to push back from the computer and sit my butt in front of my stamp table and create.  It just seemed natural to make this into an easel card for the sentiment to make sense......the little posies surrounding this are all made by moi :)  (On the bar at the top of my blog is a link to a picture tutorial I have on making some of my flowers)
     I will have to confess I don't know if I have the energy to put another one together, so this may go to the older sister - she is pretty creative herself and always appreciate the cards I send her.

Supplies:  Art Impression Golden Oldies Girls, Spellbinders, Cheery Lynn, Martha Stewart Punch, Copics, Computer


Wednesday, August 29, 2012

Trust

     My oh my, how the weeks are flying by.  I am finally using both arms after my surgery - not that being one armed stopped me from doing some stamping......stamping is a real form of relaxation for me.  I just had to plan my cards out and take my time, and use a lot of straight cuts.  Nice to feel comfortable using all the tools I have at my disposal, and be able to color with my Copics again.  This card is for the church bookstore.....they tell me they need some more and I am happy to oblige.  I will also put it in a few challenges because its always fun to put your name in the pool to win something.
     I really like this Lattice Motif die and think it looks great using matching papers.  Of course, its always fun to have an excuse to make some flowers.  These were cut with a die from white cardstock, then I put a little ink on the edges, rolled, layered, and then spritzed them with some Shimmer Sparkle.  The vines are from my Cheery Lynn die, and I edged the card, and die with my gold leaf pen.,

Supplies:  Spellbinders Lattice Motif, Cheery Lynn vine, McGill Stylus, Gold Leaf Pen, Mango Frost Matstack, Stampin' Up Trust God.

Challenges:  Simon Says Anything Goes,  Perfect Sentiment PSC47, Stampin' Sisters In Christ #154

Tuesday, July 24, 2012

Our Daily Bread Design Challenge 117

This is my 4th and final week as a guest design team member at Our Daily Bread Designs, 


This week's challenge will last for two weeks and ....
Is a sketch.....


To make the challenge even more fun, we will be giving out a prize$15 gift certificate to be used toward stamps at the Our Daily Bread Designs store!! Entries for thprize must be submitted by Sunday, August 5th at 8 p.m. EST. One random winner will be chosen and announced next Saturday. 

While it is not required to use Our Daily Bread Designs images and sentiments on your creations, we would love to see them if you have them. As a way of recognizing those who do use Our Daily Bread Designs stamps, we will again be choosing three or more of our participants  for the  Shining the Light Award . In order to qualify for this award or join the challenge, however, you must use Our Daily Bread stamps and have your submission added to Mr. Linky by Sunday, August 5th at 8 p.m. EST. If you upload your creations to Splitcoast Stampers or any other online gallery, please use the keyword isODBDSLC117.  When creating your posts on blogs please include a link to the challenge.

Now on to my take for this challenge:


     I turned my layout sideways, and instead of ribbon I chose to do flowers in its place.  I was just in a pink mood when I was laying this out. my flowers are handmade, they are easy and fun to make and I have a picture tutorial you can view here.  Stretched the take a little, but it is exactly what I had in mind when I started so I am happy. and 'hey' its all about me isn't it - LOL!! My sentiment is from the Quote Collection 2.   Have as much fun as I did playing.  See I told you I wouldn't use the sea this week, it was tempting.


For more inspiration for this challenge, please visit my dt sisters:

To see all the creations in one place or join the challenge, click here.

Materials:  Our Daily Bread Design Quote Collection 2, Spellbinder Dies, Memory Box Flower Die, Zva Pearls, Cheery Lynn Butterflies.  

Monday, June 25, 2012

Not a card....


     You have to love those $1.00 frames that Michael's sells......at least I do.  The overall dimension of this frame is 5 x 5, the inside measures 3.25 x 3.25.
     Using my largest Fleur De Lis Square Nestie with some black linen cardstock I ran this through my Grand Calibur.  Then I took the cardboard piece that was in the frame and laid it on top of the piece I ran through my machine and traced the square inside of it....I then used my Fiskars cutter to cut around my marks (if you have a square die you could probably use it instead).  In the meantime I cut a piece of 5 inch by 5 inch DP from K & C (Ancestry.com design) and trimmed the inside the same way, using the cardboard inset that was in the frame.  I glued the DP to the front of the frame that I had previously painted with some acrylic paint in the color Caramel Candy.  Then I ran my die cut through my Krylon machine and placed it over the DP.  Using my Cheery Lynn die I made a few leaves and placed them in the corner of the frame, then I added a few of my homemade flowers I had from a previous project.  On a recent trip to the craft store I found some cute Metal embellishments in a butterfly design that I used as well.
     On a piece of good CS I used my Stampin' Up More Mustard Ink and stamped the Branch and Butterfly stamp from the Our Daily Bread Designs Faith set  (it was too strong to stamp directly on my piece, so after inking I stamped it once on scrap paper and then onto the CS).  I then used an Impression Obsession stamp for the sentiment.
     This was so fun and I have so many ideas about ways to use this frame, thinking Christmas, small group gifts, family.......a pretty endless list of ideas and styles are rolling through my mind.

Materials:  Wood frame, Spellbinders, Metal, Martha Stewart Punches, Cheery Lynn Die, DP, Krylon Machine, Our Daily Bread Design Faith, Impression Obsession Sentiment


Challenges:  Simon Says Anything But a Card, Dream Valley 35 Things with Wings

Wednesday, May 16, 2012

Peace.......

   
    The challenge at Our Daily Bread Designs was to create a card using this photo as an inspiration.

     First you need to know that my DH and I had talked about going to a movie, but we were soooo relaxed  and enjoying the quiet time at home that we changed our minds.  With that in mind I was checking out the ODBD blog and saw this photo.......I was drawn to picture 4 BECAUSE of the caramel corn, yes, I had popcorn on the mind.  There is no way I can go to a show and not have a small bag of popcorn, since we hadn't gone to the show I was kind of missing getting my popcorn fix. As soon as I saw this picture my mind focused on the caramel corn......SO, the colors I chose were in the burgundy family and of course a lovely caramelly orange color, Mmmmmm! 
     I had a lot of fun making this card.  First I ran my DP through the Grand Calibur with an EF....then I took my Color Box gold and rubbed it all over the paper giving a nice highlight to the embossed pattern.  After stamping my sentiment (Our Daily Bread Designs) on a circle I layered this on another circle and then placed those on top of that lovely 'caramelly colored' paper cut with the Lacey Circle Die.  I punched this same paper with my Martha Stewart Hydranga punches and edged them in Red.  Before layering them together I spritzed them with some Gold Shimmer Mist and then added some Champagne colored beads to the center of each flower with a drop of Glossy Accents.  I used my Cheery Lynn die to cut some leaves from some other DP and layered everything on my card, having rounded the lower edges of the layers.  
     The colors on this card are so rich and the flowers turned out absolutely beautiful with the gold spritz.  


Thanks for visiting:

Supplies:  Spellbinders Die, Cheery Lynn Die, Our Daily Bread Design Sentiment, DP, Embossing Folder by Spellbinders, Recollections Beads, Color Box Ink.

Challenges:  Our Daily Bread Design Challenge, ODBDSLC 108

Tuesday, May 15, 2012

A little birdie told me....


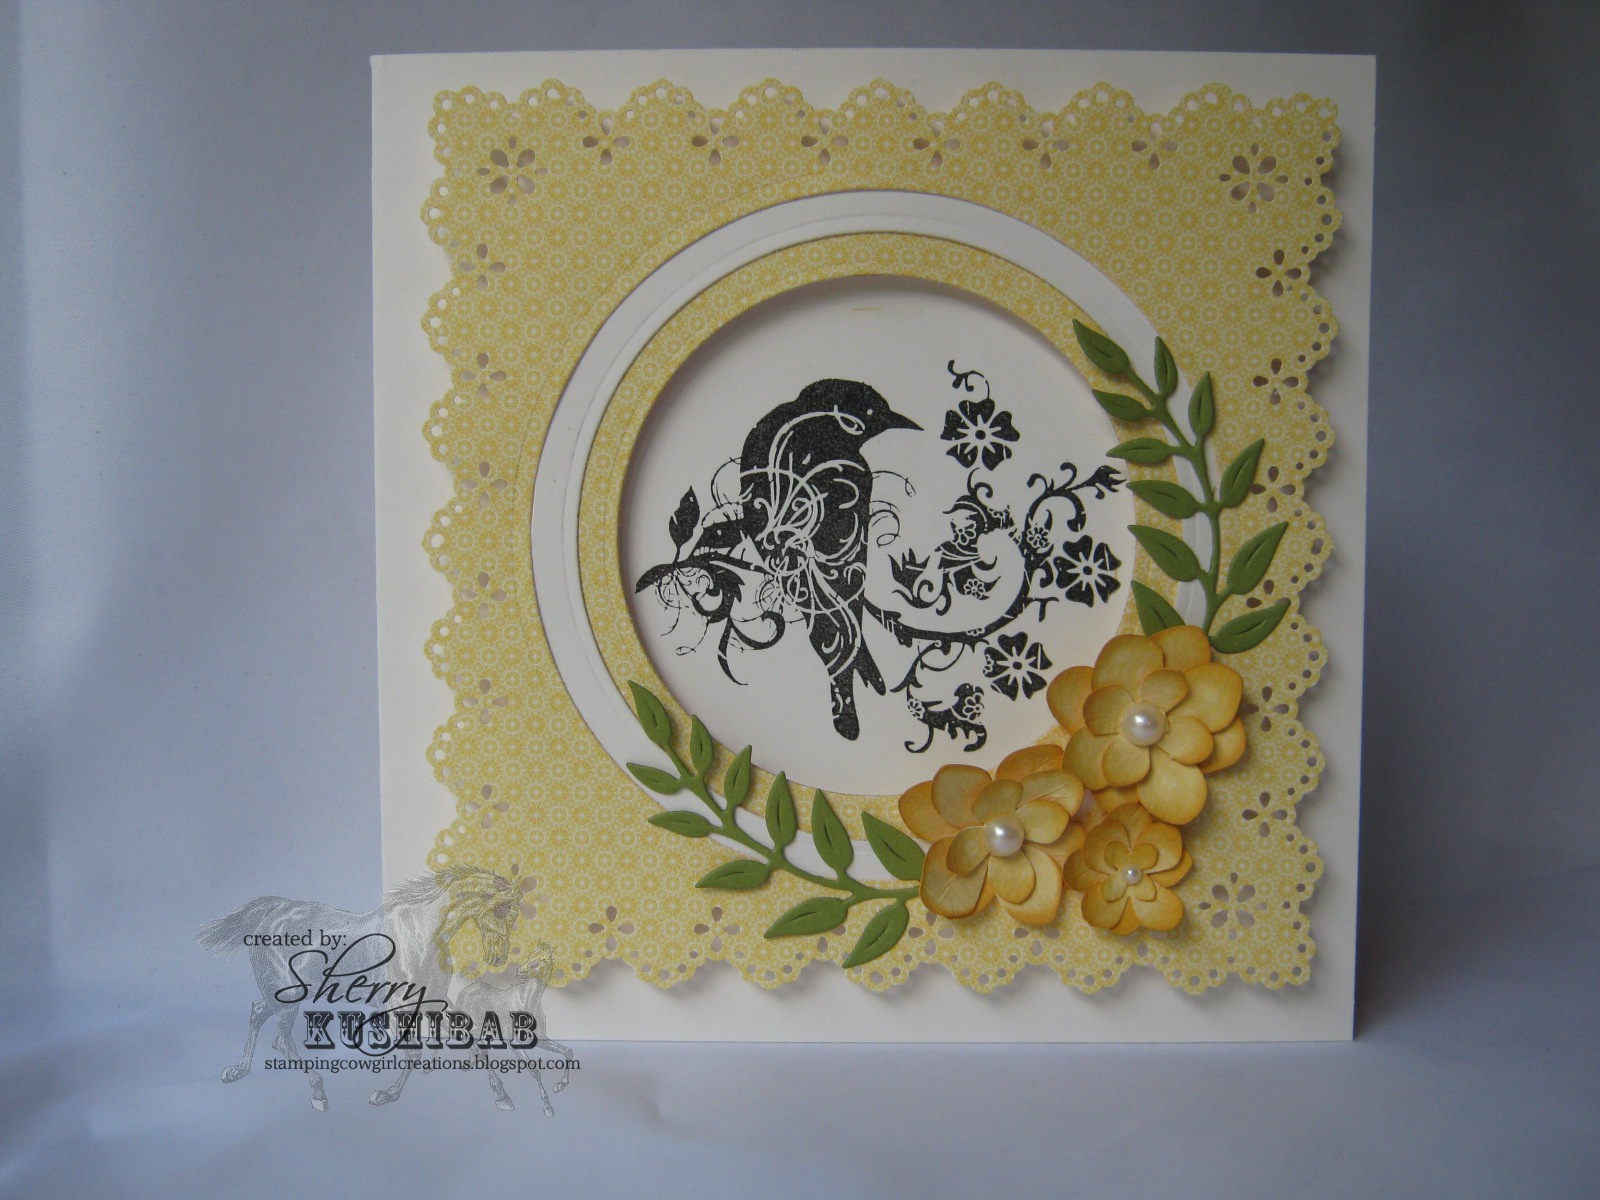
     I was inspired recently to try a new way to frame and layer.  First I cut my paper 5x 5 and used my Martha Stewart Punch around the edges.  Then I used a Spellbinders die to cut a circle in the center.  I used two other sheets of paper to make two smaller circles with the Spellbinders Circle dies and matted them all together.  I chose a simple image this time to place in the center of my card and then used pop ups below my 5 x 5 sheet to make it stand out from the image.  Since I haven't done anything like this I decided to keep the colors subtle.  The flowers are ones that I made, there is a picture tutorial you can click on in my tab bar above to see how I make them.  This is a style of card that holds a lot of possibilities with other images, papers, and embellishments.

Thanks for visiting,


Materials:  Martha Stewart Punch, Spellbinders Die, Martha Stewart Hydrangea Punch, Cheery Lynn Leaf Punch, Studio 112 Stamp, Pearls, Cardstock, Pop ups.

Challenges:  Stampin' Sisters in Christ - Challenge 139

Sunday, April 29, 2012

White on White

     My stamps are in drawers with categories on the front,  If you know me it is no surprise that the Western and Christian stamps share equal space. My heart belongs to both of them when it comes to stamping, I am trying to branch out a little.....and why not, that means more stamps of other images to play with - and there can't be anything wrong with more stamps.
    The scripture I used from Our Daily Bread Designs is one of my favorite, and from their Customer Favorites released last August. When I think of a new creation I think a clean start or all white. With that thought in mind as I put this scripture to ink, it is no surprise the card is 'simply' white with lovely butterflies (and of course a few pearls, I do like pearls).  What a comforting scripture to know that when I know Christ and embrace Him in my life, I too become a new clean slate for Him to work through. The old me is gone and I am renewed by his gift on the cross and through His resurrection.


Thanks for visiting: 
Materials Used:  Sizzix Embossing Folder, Our Daily Bread Designs Stamp, Cheery Lynn Butterfly Die, Spellbinders Nestabilities, Vellum, Cardstock,  Pearls

Thursday, March 22, 2012

Let there be Color

     A few weeks ago I purchased a new Cheery Lynn die called "French Lattice" and have been itching to use it. Thought it would be fun to use a plain background and use my die on patterned paper.  This particular paper had lots of colors in it and I chose to focus on the oranges.  I used a scripture from Our Daily Bread Designs along with their Elegant Oval stamp and matching die.  Then I embellished with some Zva pearls, and Recollections flowers with a few small leaves cut from another Cheery Lynn Die placed strategically around them....LOL....another way of saying to fill in some space.  I am getting some cards ready to send to the Church Bookstore and this will be one of them.  Also, the challenge at Stampin Sisters in Christ was to make a card that showed something about the new season, I think flowers meet those requirements since as I look out my windows or drive around I see nothing but trees and flowers in bloom......I am loving the bursts of color throughout nature!!!  


Thanks for stopping by,
Materials used:  Cardstock, Our Daily Bread Design Scripture, Elegant Oval Stamp and matching Die, Recollections flowers, Cheery Lynn Die Flourish and French Lattice Small Frame, Zva pearls.

Challenges:  Stampin Sisters in Christ, challenge 131, Word Art Wednesday, Challenge 21

Monday, March 19, 2012

Our Daily Bread Designs 4th Anniversary Challenge

     Wow -Our Daily Bread Designs is celebrating their fourth year in business.  I remember the first year they were at the Collinsville, Illinois show after I had just discovered them on-line.  What a thrill to be able to touch the stamps and look at each one.  Kelley was doing demo's and Rick was manning the register.  I had the privilege of helping them at their third show in Collinsville, and I can tell you they have grown because they no longer fit in the corner I first saw them in - it takes a lot more room to display the product and cards they show case at every show.  I am very partial to the scriptures, sentiments, and images they design and provide...I use them a lot.  Since it is their anniversary the challenge was to use 'aquamarine' for 'fourth anniversary's'.  Such a lovely and peaceful color - I chose a pattern that has rich chocolate in it as well and managed to place a few flowers and some bling around the scripture.  Wishing them all the best and many more successful years in business.
Thanks for visiting,

Materials Used:  Our Daily Bread Design Scripture Set, Cheery Lynn Die, Spellbinders Die

Challenges:  Our Daily Bread Designs Blog Anniversary Challenge

Monday, February 20, 2012

Easter Flowers

     While running around last week I managed to sneak into my new favorite stamp shop nearby.  They had the new Flourishes set He Is Risen.  Easter will be here before I know it so I grabbed the set and found some time this weekend to work in my stamp room (LOL, like I need an excuse).  It was my hope to CASE Christine Okken at ChristineCreations....but the more I worked at trying the more obvious it became that this card had a mind of its own.  Instead of the lovely card she made with a cut out frame, I ended up with a round scalloped card and no frame......best of intentions don't always work out the way you think they will.  Nonetheless, I am very pleased with how this turned out and look forward to sending it out for Easter.
     I colored the flowers with my blue, green, and yellow Copics - then cut them out.  None of the blue paper I had really rocked my boat so I found this lovely soft green patterned CS that appealed to me more.  I'm pretty sure I will never grow tired of my Cheery Lynn Border Flourish die that I used, it is a favorite of mine.
Thanks for visiting, have an awesome day,
Materials:  Spellbinders Grand Nestabilities, Copics, Flourishes Stamps, CS, Krylon Gold Leafing Pen, Cheery Lynn Die


Wednesday, September 28, 2011

A little LOV (Lily of the Valley)

     Finished playing with the card I started yesterday....it .needs to be in the mail later this week.  It is a bright and cheerful card that carries special Birthday wishes with it to a friend.
     I just love this little Lily of the Valley stamp "Rosie with Cake" - like all of their stamps she is just adorable.  Just received the Christmas ones I ordered last week and all I can say is 'sweet, sweet, sweet'!!!
     Even sweeter is the Cheery Lynn  Fanciful Flourish die I used to surround my Spellbinders Lacey Circle...The delicacy and details of this flourish are fabulous. I could play with them all day.


Materials used:  Cardstock, Ribbon, Martha Stewart Punch, Cheery Lynn Fanciful Flourish Die, Recollections Flowers, Spellbinders Lacey Circle Die , Lily of the Valley Stamp, Copic Markers, CB Embossing Folder.


Challenge:  Celebrate the Occasion - ribbon. Party Time Tuesday - anything goes #35 , Make It Monday - Anything Goes #55,  Inky Impressions - #26 punches and dies
01 09 10