Showing posts with label rhinestone. Show all posts

Thursday, January 9, 2014

Vintage Valentine Pop Up


My inspiration for this card came from the original 1908 Valentine's card that was my grandmothers. Sacrilegious as it may sound I took the card apart and scanned it to use.  The truth is that while the card holds sentimental value to me I like knowing that is being re-purposed, so to speak, being used in a new card. Like the original card I made this one a pop up as well.  You can see below that the card folds down when you open it and it has an unusual shape with the front cover not going all the way to the top.  The original card inspired me to create the piece this way.  


While I enjoy the look of vintage cards I just couldn't see making this one all frilly, lace and glitter....I instead chose a harlequin print stationary in my stash and some Spellbinder dies to create my own look


Below is a copy of the original card -  I have post cards from several holidays that were my Grandmothers. As I handle them I am always touched that she had family that loved her so and amazed at how well these cards still look at over 100 years old. 

Materials:  Computer, Spellbinders Dies, Cardstock, Designer stationary, rhinestones, vellum, embossing folder


Wednesday, December 18, 2013

Exploding Barn

     My daughter and I made our yearly trek to the White Stallion Ranch to do some horseback riding.  There are about 18 of us who meet there each December from all over the US and world (England, Germany, Channel Islands, Minnesota, California, New Jersey, D.C. Tennessee - we adopted a visiting Australian this year as well). Every year we celebrate the birthday of a lovely lady named TJ.  This year we knew we would be celebrating number 75 with her.  Such a birthday called for a special card.  Months ago I began dreaming the idea up in my head for an explosion box card AND FINALLY just before Thanksgiving I had time to sit and play.
     With the help of my Silhouette Cameo I was able to design a cake (my own design) and a barn style cover for the box (again my own design).  The barn door is a cut file designed by Cali Arroyo, and the cactus and wheel are a cut file design by Jamie Cripps.   The sweet horse on top of the cake and peeking out the window is a digital stamp from Clear Dollar Stamps.   
     After designing this cake and frosting on my Silhouette Cameo.... I decorated it with a personalized message for TJ!!  Every cowgirl needs some 'bling' and TJ's is on her cake - since the whole theme was barn oriented I placed the cake on some hay!  
     I couldn't carry the card around the ranch and get signatures on the sly (given its size) so I created individual cards that I could slide out of the fences and carry around with a pen in a zip lock bag.  This allowed me to get lots of good wishes for her on both sides of the inserts.  

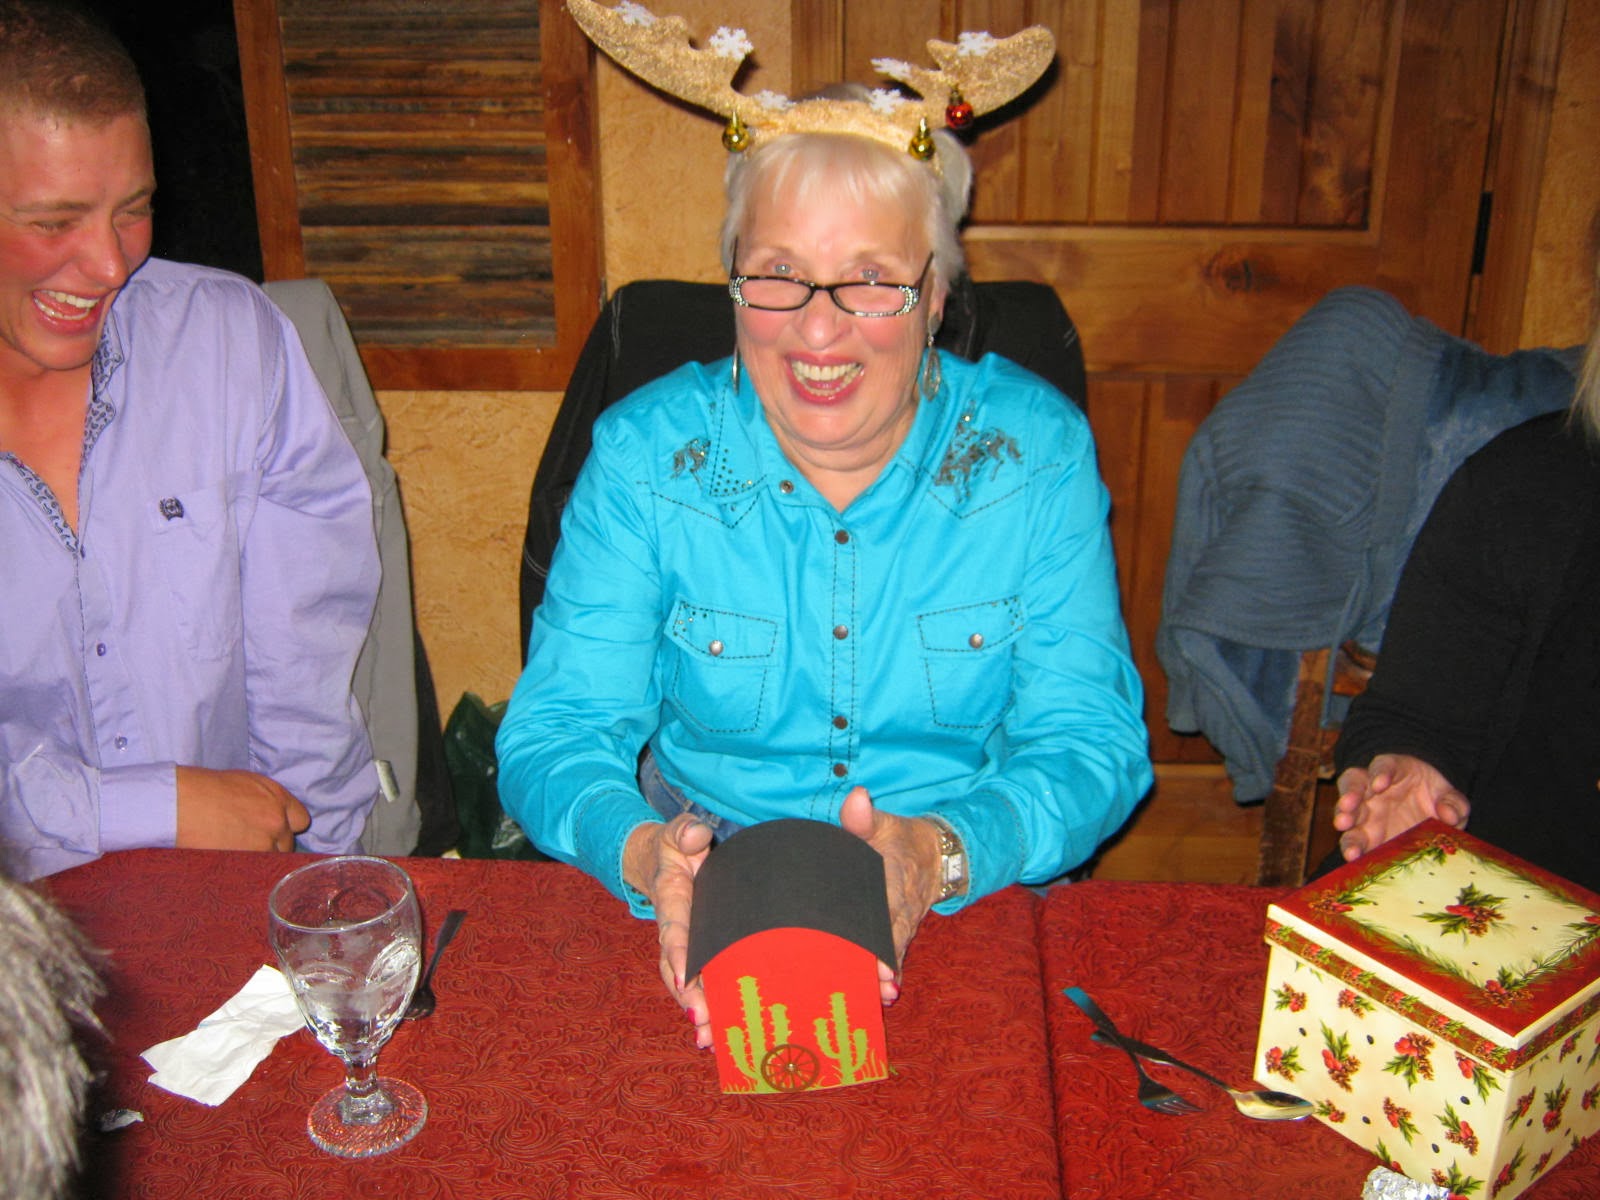
     Below is TJ getting ready to open her explosion box card - she was so excited by all the people who left her messages and Birthday wishes and she is ALWAYS so complimentary about the cards I make her....this one was a huge surprise to her.  


     It was great fun making a card like this for such a special lady.....BTW she is wearing antlers because I couldn't find a tiara at the grocery store in Marana and holiday antlers were as close as I could come.  She is a great sport.  

     Going to post this on the Silhouette challenge this month for 3-D  --  I love making 3-D cards and using my Silhouette has made them even more fun. I am posting this over at the Silhouette Challenge for 3-d and anything but a card for December - think about joining in on the fun.  

Supplies:  Silhouette Cameo, Rhinestones, Embellishments, Memory Box  fence, Clear Dollar Digital Stamp, Copic markers


Challenges:  Silhouette #8 3D

Saturday, October 26, 2013

Vintage Santa Step Card

    Visit my blog often enough and you will begin to see that I love Step Cards and 3-D projects.  While perusing Pinterest recently I came across a card with this new shape I hadn't seen.  Her picture tutorial was nice, but it seemed to me a lot of paper was wasted in her layout.....so, I went to my handy dandy Silhouette Cameo and drew out a background to use.  This machine comes in soooo handy.  I not only now have this style of card ready to cut when I want -- I can also cut out my layered pieces to the correct proportions as well.  Often using scraps and laying them out for one run through.  Now that's efficiency.
   Vintage cards are usually not my style - but around Christmas time these images always appeal to me.  I have several post cards that were my Grandmothers, as well as some other images, that date back to around 1903 - 1912. I have made cards and ornaments from copies of several of them over the years.  This paper by K & C from last years holiday stash seemed perfect for this image.  The card when flat fits in an A6 envelope.  
     After making this one I decided to start another one - the next is going to have lots of glitter to make it a little more vintage looking - I'm thinking it will be very nice looking.  If I have a chance I'll try and post it.
Thanks for stopping by

Materials:  Copy Vintage Post Card, Computer, Spellbinders Label Die and Gold Label Four, Rhinestones, K & C DP, Pop Ups


Tuesday, March 26, 2013

By His Wounds

     During Lent a group of musicians and worship leaders from all across the South have posted a daily devotional on You-Tube - I have been following along daily.  They have actually been using material and readings from the Book of Common Prayer - which has been interesting as some have never used this book before and their insights into the scripture has been a breath of fresh air.  Just a click of my mouse and I can have as much time to mediate and pray during the devo as I need.  How exciting this week is as we travel through Holy Week into Easter......As I have said before, this season begins much earlier for me, at Christmastime.....you can't have the cross without the creche.  I am humbled by the sacrifice Jesus made on my behalf. It is with joy that I look forward to celebrating His resurrection this Sunday.

     I have had a great time making some explosion boxes for Easter and today I worked on a 'pop-up' card. Once again I went to my 'go to' stamp from Flourishes....this is the perfect size cross, and the Easter Lilies that adorn it are just beautiful.  I stamped, colored and then cut the cross out....I also stamped a second cross that I then cut the center Lily from and colored.  Using some scrapbook adhesives I popped this up on the cross.
     Using my circle dies (offset) I cut a piece of silver to place behind my image.  With my Cheery Lynn dies I cut some greenery to place around my cross.  An Easter sentiment was placed inside of my Elegant Oval Frames from Our Daily Bread Designs and cut with their matching Spellbinders die.  A little bling, because this is a festive and awesome day I am celebrating, and the inside of the card is complete.
     For the outside I used a larger Elegant Oval Frame from Our Daily Bread Designs with a sentiment from their 'He Will Rise' set.  I cut out and colored a lily for the corner of the die.  Keeping the cross in mind I ran the  front panel of my card through my Grand Calibur with their M-Bossabilities wood die.
     Time to be getting some of these in the mail - Easter will be here before I know it.


Supplies:  Flourishes Stamp, Our Daily Bread Design Stamps and Die, Cheery Lynn Die, Bling, M-Bossabilities, Copics. 

Challenges:  ODBDSCS148 He is Risen, Cheery Lynn 73 Celebrate, Word Art Wednesday Anything Goes

Wednesday, February 27, 2013

A little birdie told me...

     There is something very refreshing about black and white cards.......they always seem so fresh and crisp to me.  When I saw the challenge at Our Daily Bread Designs this week was for black, white or cream I couldn't help but get one of their stamps out and play.  I do have to confess that after taking this picture I decided to color the little berries red, then used a little crystal effects over them.  I liked the little pop of red after doing that.....but since the picture was taken I decided to go with it as is - you'll have to use your imagination.
     I used some ribbon on the bottom for this one, I like this design so I am planning to make a set as a gift and will use a lovely Thank You sentiment on the bottom. This is a great stamp from Our Daily Bread Designs and I love that it has a  matching die make - this makes  it soooo easy to cut it out and pop it up. Has me thinking spring!!   Also, in real life the rhinestones on the lattice really make this card look lovely.

Supplies:  Our Daily Bread Design Stamp and Die, Cheery Lynn Lattice Die, Spellbinders Circle Die, Rhinestones, Celebrate 360 Ribbon

Challenges:  Our Daily Bread Designs ODBDSLC144, Word Art Wednesday Challenge 69

Tuesday, October 16, 2012

Humble Setting

     Little by little I am eeking out some Christmas cards between other things that need to be done. Followed the sketch for a challenge at Our Daily Bread Designs for this card.  This sentiment is one of my favorite from Morningstar Stamps.  When we were in the St. Louis area I participated in several drama productions through our church during Christmas, and Easter.  Our pastor wrote his own plays, which usually had a very contemporary take, with vignettes from Biblical times.  So, I was drawn to this sentiment when I first saw it while shopping at a stamp show.  What a great gift the Baby Jesus was that quiet night.

Supplies:  CS, Martha Stewart punch.  Spellbinders, Rhinestones, Heartfelt Creations Stamp, Morningstar Stamps, Copics

Challenges:  Our Daily Bread Design  ODBDSC125 Sketch Challenge, The Crafty Bloggers Network Anything Goes,  Totally Stampalicious Christmas

Monday, June 18, 2012

Red, White and Blue


     It may not be the Fourth of July yet, but this past week was Flag Day (I always remember this day because it is also my DH birthday).  Recently I have been playing with some small frames I purchased at Michael's.  The first few I covered with paper and I really liked them, but I wanted to try my hand at painting and stamping one.
     I covered this small frame with some Red Apple acrylic paint, then I took the Wood Background stamp from Our Daily Bread Designs and inked it up with some brown ink.  The stamp is not quite wide enough to cover the entire frame so I had to stamp it once, then eyeball it and stamp it a second time.  I think it turned out very nicely and I have more ideas to play with this same look and maybe aging it a little.
     Wanting to enter this in the challenge over at Really Reasonable Ribbon I then took some cute little 'red, white and blue' ribbon and with my score tape layered it across the bottom.  After looking through tons of images and ideas for the center I settled on a computer generated sentiment that I stamped over with a Northwoods Fireworks stamp, and then jazzed it all up with the large blue stars around it.
     I will be entering this in the Our Daily Bread Designs challenge for summer in the USA, I think fireworks are a big part of the summer celebrations....I am very patriotic, one of those people who cries when they play the National Anthem.....
     Be prepared to see a few more things with these frames I bought 24 of them when I was in the store, I'm thinking Christmas gifts for some Bible Study friends and family!!!
     Thanks for visiting,
Supplies:  Michaels Frame, Our Daily Bread Designs Stamp, Basic/Basic Ribbon, Star Rhinestones, Northwoods Rubber Stamp 

Challenges:  Really Reasonable Ribbon #50,: Red, White and Blue, Our Daily Bread Designs ODBDSLC112 Summer
01 09 10