Showing posts with label Cardstock. Show all posts

Monday, August 4, 2014

Exploding Box for a Boy

     It is pretty obvious from many of my posts that I like doing Exploding Box cards - I especially enjoy trying different themes, and styles.  For some time now I have toyed with the idea of making one that could be used for a guy.  Last year when I gave my hairdresser a set of note cards she was thrilled....so thrilled that she asked if I could do more work for her and we would barter.  Her son's 13th Birthday is at the end of the month and she wanted an Exploding Box card for him, just my opportunity to play.  He enjoys sports AND his family collects antiques of all sorts.  When I saw this Graphic 45 'Good Ol Sport' 6 x 6 paper at Impressive Ideas (my fave stamp and paper shop in Roswell, GA) I just had to have it. 


     My usual cake is a round cake that I designed with dripping frosting down the side.  I didn't think that was manly looking so I created a square cake.  So many square cakes you see have ribbon around the outside - those were my inspiration, I just took it a little further and designed a two layer cake with designs from two of his favorite sports.  Again, I didn't want to get toooo many details since this is a guy card, so I kept the lines simple.
     As usual I used my handy dandy Silhouette Cameo to create and cut the entire card and panels. This means I have saved the files and can make another of these whenever I want, and I want to do that soon.

     I get my hair done tomorrow and will be delivering this with some other things she requested, and a small surprise.  Most of the other items were done using my Silhouette as well - best money I ever spent on a machine.  

Materials:  Card stock, Silhouette, Free Clip Art, Graphis 45 Paper, Ribbon, Zip Dry Glue, 

Saturday, August 2, 2014

3-D paper crafting

     Recently made my boss an Anniversary card for her husband.....it was such fun making it that I thought I would add one to my Etsy shop.  This particular one is for a 25th Anniversary - I love that I can personalize this style any way that someone may want.  I loved using my Silhouette Cameo to make this, literally everything except the flowers was print/cut with my Cameo - its a great machine that I am pretty sure can do even more if I could find a way to spend more time working with it.  Maybe now that I am partially retired I will get to play more.
     The outside of this box used an embossing folder - the lid of the box for my boss had her initials on it, all fancy schmancy looking!  We also used a picture on each side of hers - the left side had her wedding photo, and the right side had a recent photo of she and her husband, it turned out very nice.  Having used their personal photos on it I don't feel comfortable posting it to the blog, just trust me that it was lovely :)
   
     I will probably make some more of these for Valentines day.......already have one started for Halloween, its going to be spooktacular, bwahahahaha!
    Thanks for stopping by.

Materials:  Silhouette Cameo, Celebrate It Ribbon, Metallic card stock, cardstock, Martha Stewart punch,

Sunday, April 13, 2014

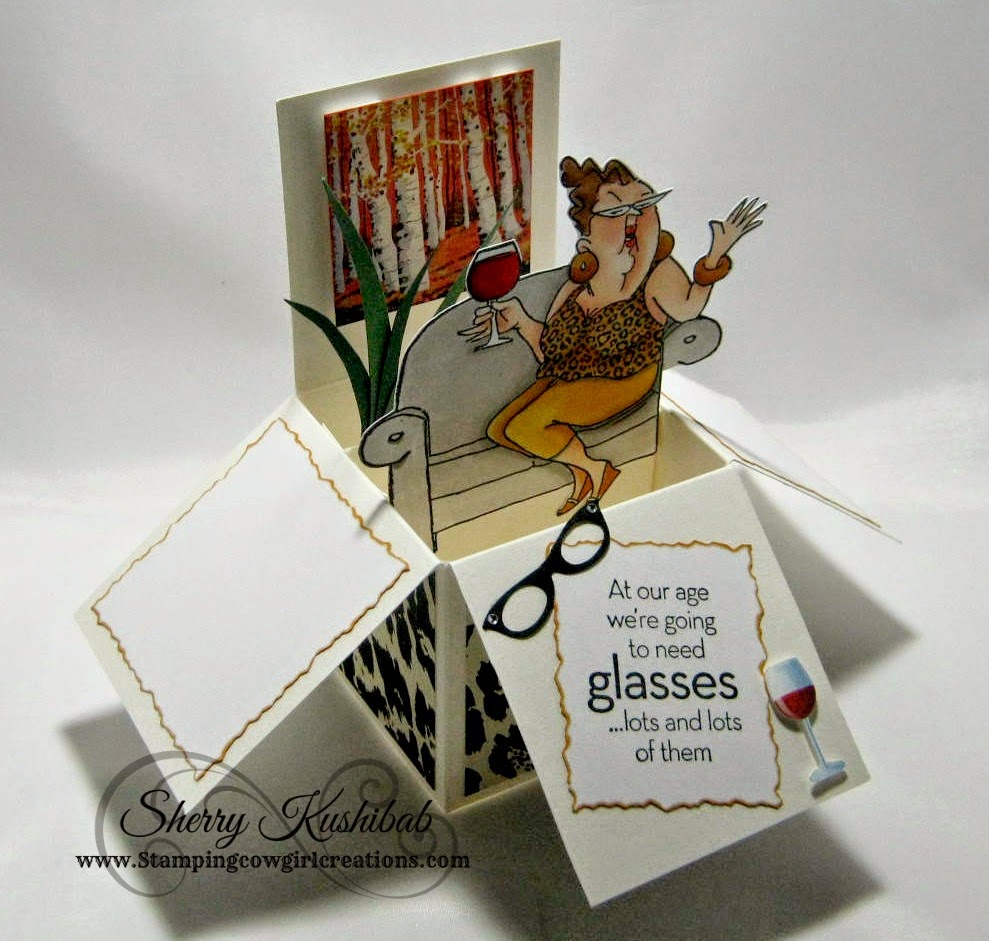
Glasses, glasses - where are my glasses.


   Recently I took some time to create a pop up box card, not to be confused with my Explosion Box cards, this style of pop up card has become quite popular after a tutorial on Splitcoast Stampers HERE.  While I love the ones using flowers, and I am sure to make some like that, this particular day I was driven to use an AI stamp I purchased last fall that has never been inked up.  These cards are nice and you can put a lot of layers together, but proportion is key, in my opinion.  I just couldn't see how this stamp would work but I was determined to try.  Playing around I discovered that if I cut part of the couch arm out this sassy little lady fit wonderfully.  It became obvious to me as I played with this and the sentiment that came with her that I needed to make this card for Jill Saur, my art instructor, she is always switching her glasses to look at various pieces that students are working on.  To make the card even more personal I went to her website and copied a piece of her artwork (scaled way down) to use in the background.  She paints stunning scenes with birch trees, as well as many other lovely pieces. Since she shares her talent for art and teaching with me I wanted to share some of my card making talent with her - I think she enjoyed her card.
 Yes, you read correctly I am taking art classes.   I am at the age that one realizes they are getting older.....don't get me wrong I still adhere to that old adage 'growing up is inevitable, growing up is optional'.  However, this year is a milestone birthday for me...as I will be turning 60.  No matter what they say 60 isn't really the new 50 - it is 60!!!  Needless to say I have been pondering this event since my last birthday, reflecting so to speak......where have the years gone, how do I feel about things I have accomplished or not accomplished.....and what do I want to do as I grow up. There is no bucket list, but there are some things that I have always thought might be fun to try or learn and I recently gave myself permission to try one of those things - the aforementioned art class.  After thinking about it for more than a year I got in touch with a local Artist/Teacher Jill Saur in my area and was able to find a place in one of her classes.  This week was my fourth class and I am so happy with my decision to take this risk and develop this new skill. There are some lovely people in class......I have enjoyed the other students and Jill. The two and half hours fly by each week.
 

Supplies:  Cardstock, Art Impression's Celeste Set, Clipart, Silhouette Cameo die cut, Copic Markers, 


Sunday, November 24, 2013

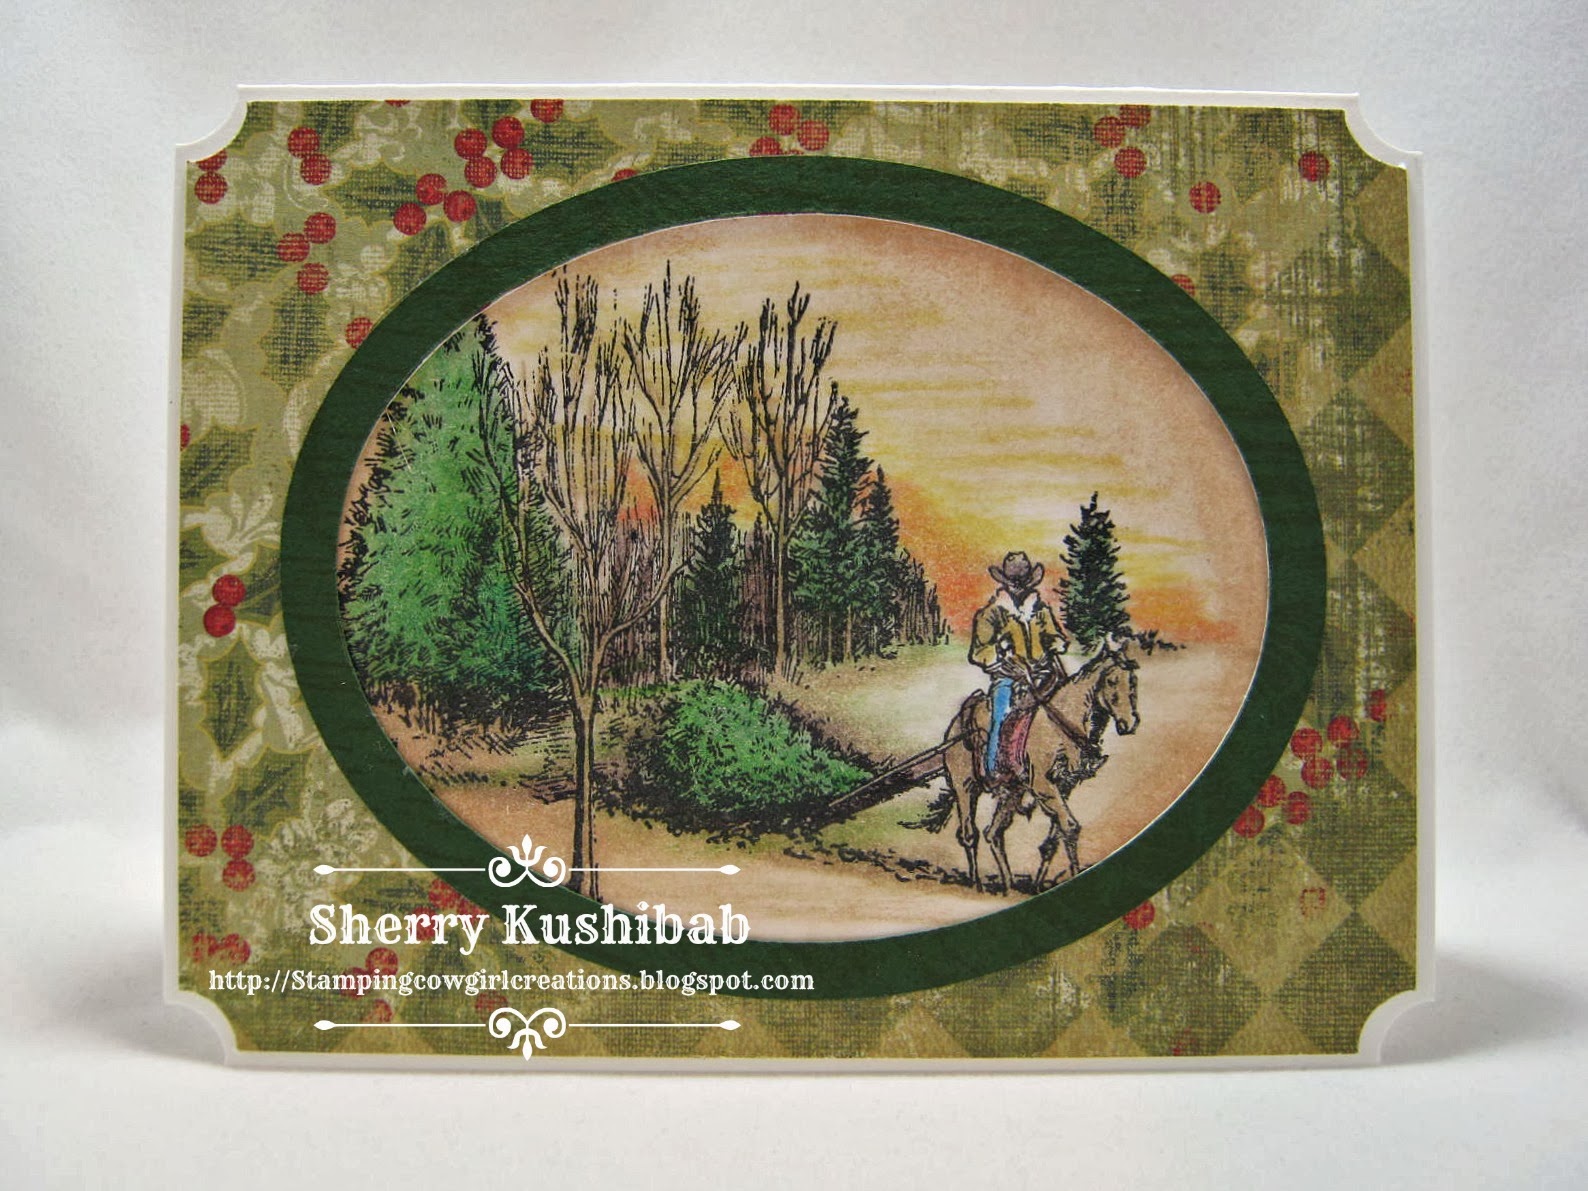
Country Cowboy Christmas

     If you know me at all you will find it no surprise to see this stamp inked up and colored.  Why it took me so long to get it is beyond me.....guess that thing called life got in my way for a few weeks.  However, from the moment I first saw it on on the blog of some of the Flourishes Design Team members I knew it would find a home with me.
    YES, I love it because it has a cowboy on it, but I also love it because it evokes a warm fuzzy feeling when you view it, whether it is colored or kept color free.  Can't you just imagine the anticipation of this country family waiting for the 'perfect newly cut tree' to be pulled to the front door.  The ornaments are out, popcorn has been strung......little hands are ready to decorate the tree.  I bet there is a warm fire glowing in the hearth as well. A warm homey Christmas scene.
     I want to just take a moment to thank the illustrator Lauren Pope for creating this lovely design and Flourishes for making it into a stamp.
     After stamping this lovely image I used my Prisma color pencils - I heard that gasp just now, shock over my not using my oh so favorite Copic markers.  I just felt the pencils would work better....I want to ink this up again and use my water colors.  Using my Silhouette Cameo I cut an oval the size I needed in some designer paper and placed it over my image.  To give it a little more pop I cut another oval out of some green card stock that I stamped over with a wood grain stamp - hard to see in this photo but it helped keep the green card stock from having that plain jane look, wood also seemed the right effect.

      The inside was kept fairly simple with one of the many sentiments included in the set.  Yes, it is beginning to look a lot like Christmas around here.........Thanks for stopping by.

Materials:  Flourishes Country Time Christmas, Silhouette Cameo, Card stock, Versafine Ink, Prisma color pecils

Challenges:  

Saturday, October 19, 2013

Santa nestled in the greenery

    Months ago I saw a card on Pinterest that fascinated and inspired me.  I had only recently purchased the Spellbinders Ornament die, but realized the shape of the card was nothing close to what I owned.  So the picture was filed away until recently when I decided I would just have to make my own background to replace die used in my inspiration piece.  Why own a Silhouette Cameo if you can't get creative.

     I designed my own shape for the easel background and then started playing.....I am in love with this sweet half moon Santa from Sassy Cheryl and I thought he would look great.  However, he just looked SO plain sitting on the ornament - next thing you know I drew upon my inner Kiitie Caracciola  (oooh I love her work - you can check out her gallery here) and out came the Martha Stewart punch, some snowflake dies, blinginty bling and soon Santa was nestled amongst the greenery with snowflakes falling.  I do have to admit that at one point I had to tell myself 'step away from the bling' as I was afraid I might be getting to carried away.  Below I have posted the inspiration image and a second card I made using this same easel background I created and the Spellbinders Ornament die.....it amazes me how changing things like paper, and images can make three very similar cards look so different.

This is the inspiration piece, now watermark can't remember who did it, but they are talented. 

This is my second card using the shapes from my first one at the top of the page. 
     Just love how both of my cards turned out - beginning to look a lot like Christmas around here.  I have about 13 ornaments painted and finished and ready to go.  Thanks for looking. 

Materials:  Silhouette Cameo, Spellbinders Ornament Die, Bling, Martha Stewart Punch, Designed2 Delight Digital, Sassy Cheryl Digital, Designer Cardstock, Copic Markers, IO Snowflake Die

Challenges:  Just myself :)

Monday, October 14, 2013

With Sympathy

     While I enjoy creating cards I always find it a challenge to be asked for a Sympathy card....you want the card to reach out and touch the recipient, yet words are so difficult in those times.  My co-worker needed a card for her Aunt who lost an older daughter pretty suddenly.  As I surfed the net I came across a blog that had a poem that brought me to tears.  The woman posting it had lost a child and put this poem, she had received, on her blog because she was so touched by it.  There was no credit for who wrote it (I may have to Google further to find out and I will update that info if I find it).
     It was such a long poem I struggled with putting it on the inside of the card.  Should it be on vellum as an overlay on some lovely paper with hearts in the background, should it be shrunk down and made so small it couldn't be read?  Finally,  I decided it should be the background of the front of the card.  I printed it in grey ink and adjusted them so that the words went around the die I wanted to put in the middle -- two hearts, the poem ends with a reference to the heart.
     It is simple and yet I think it conveys a lot of heartfelt thought.  I kept the sentiment on the inside simple

Materials:  Computer, Spellbinder Die, Heart Embellishment, Cardstock

Tuesday, September 3, 2013

A Savior is Born.....

    Once again I will say I just love my Silhouette Cameo.  This sweet and lovely poinsettia was cut on it from a Lori Whitlock cut file.  It is framed beautifully with a little extra greenery from my Cheery Lynn die as well.
     If you saw my previous post you may have read that it was a busy day in my Stamp castle recently.  I can be forgiven for thinking it is Christmas since I work in the retail world and as we ramp up for the holiday it sometimes feels like its already here.  I used my Spellbinders Radiant Rectangle die to create this in the same manner I created the one for the Halloween post earlier. The pages have Collal Silicone glue between them to keep them raised. The great thing about the poinsettia is I can make it ANY size I want using my Silhouette Cameo.  This whole card is no larger than 6.25 x 4.25 and has an easel stand I made with my own design on my Silhouette.  

    After making one in blue I just knew I would want one in red as well.  On this particular one I used my fave Krylon Gold Leaf pen around the edges of the outside of the red back.  Every time I look at these I make myself crazy - I think, "Oh I love the blue" - then I think, "Oh I love the red" - then I think "No I love the blue".  I swear each one is my favorite.  These to had to have boxes made to transport them in....still decorating those.  

     I have some more ready to assemble as I post this - think this will be a special Christmas card for some people close to me.  Not saying who, you know if you've been naughty or nice - just saying!!

Supplies:  Silhouette Cameo, Lori Whitlock File, Cardstock, Krylon Gold Leaf Pen, 

Friday, July 26, 2013

Hush little baby don't you cry.....

     You have no idea IRL how adorable this little fella looks.  When I discovered that Bambino from Sugar Nellie was available as a digital, I swear I swooned!!  This is an image I have coveted for sometime, to be able to own it as a digi - well I could hardly contain my excitement.
    Upon discovering this image I immediately purchased and downloaded it - before printing I adjusted my print settings to print in a light grey ink.  When coloring an image like this, one would like to take credit for the beauty of it, but the image is so wonderfully drawn that, using my Copics, it took very little talent on my part to bring him to life.
    I must confess that the background was made using my Silhouette Cameo with a pattern from Lori Whitlock, and was sitting on my desk from a few weeks ago (since it was blue that is what determined this little cutie would be a boy).  The card was originally going to be used for a birthday card that I later decided I wanted bigger - so I resized the pattern on the Cameo and made another step card to use.  I sat this on the shelf waiting for future use.  Waste not, want not.
     Honestly, I am so crazy about this image I had trouble even wanting to put anything around him.  Digging into my stash of embellishments I came across these sweet little buttons that have been waiting a LONG time to be used, then I settled on a small sentiment from an old Fiskars Baby set.
     This card will be thrown into the challenge at Use It Tuesday where they challenge you to use what you have.  I also meet the challenge at Creative Inspirations for their Bingo call using Ribbon, Sentiment, and Buttons from the first row of their challenge - used them all in a row on my card as well :)
     Now I hope someone has a little boy soon so I can put him in the mail!!

Supplies:  Digital Image Sugar Nellie, Ribbon, Buttons, Fiskar Stamp, Spellbinders dies, Silhouette Cameo, Lori Whitlock Pattern for Silhouette, Cardstock, Copics

Challenges:  Use It Tuesday #60,  A.R.T #7, Craft Den #97, Fussy & Fancy #94 More than one fold,  Creative Inspirations #224 Bingo

Sunday, July 14, 2013

Big Green Tractor

    YES, another card with my Silhouette.  No, I haven't forgotten how to stamp - I recently received a request from a sister stamper for some prayers and a card to cheer up a sweet lil 4 year old boy who is very ill. One day he looks fine and the next his mom notices he doesn't seem to be himself, a trip to the ER, several tests and within two days they admit him to the hospital, fly him to a different hospital and he is receiving chemo through the spine.  Apparently he has Burkitts Lymphoma, it comes on quickly and progresses just as quickly - he is being lifted up in prayer and we want to cheer him up.  He loves the color green and likes tractors. Needles to say us stampers want to make him something that will bring a smile to his face.

     Not having any tractor stamps I had to move to plan two - my Silhouette.


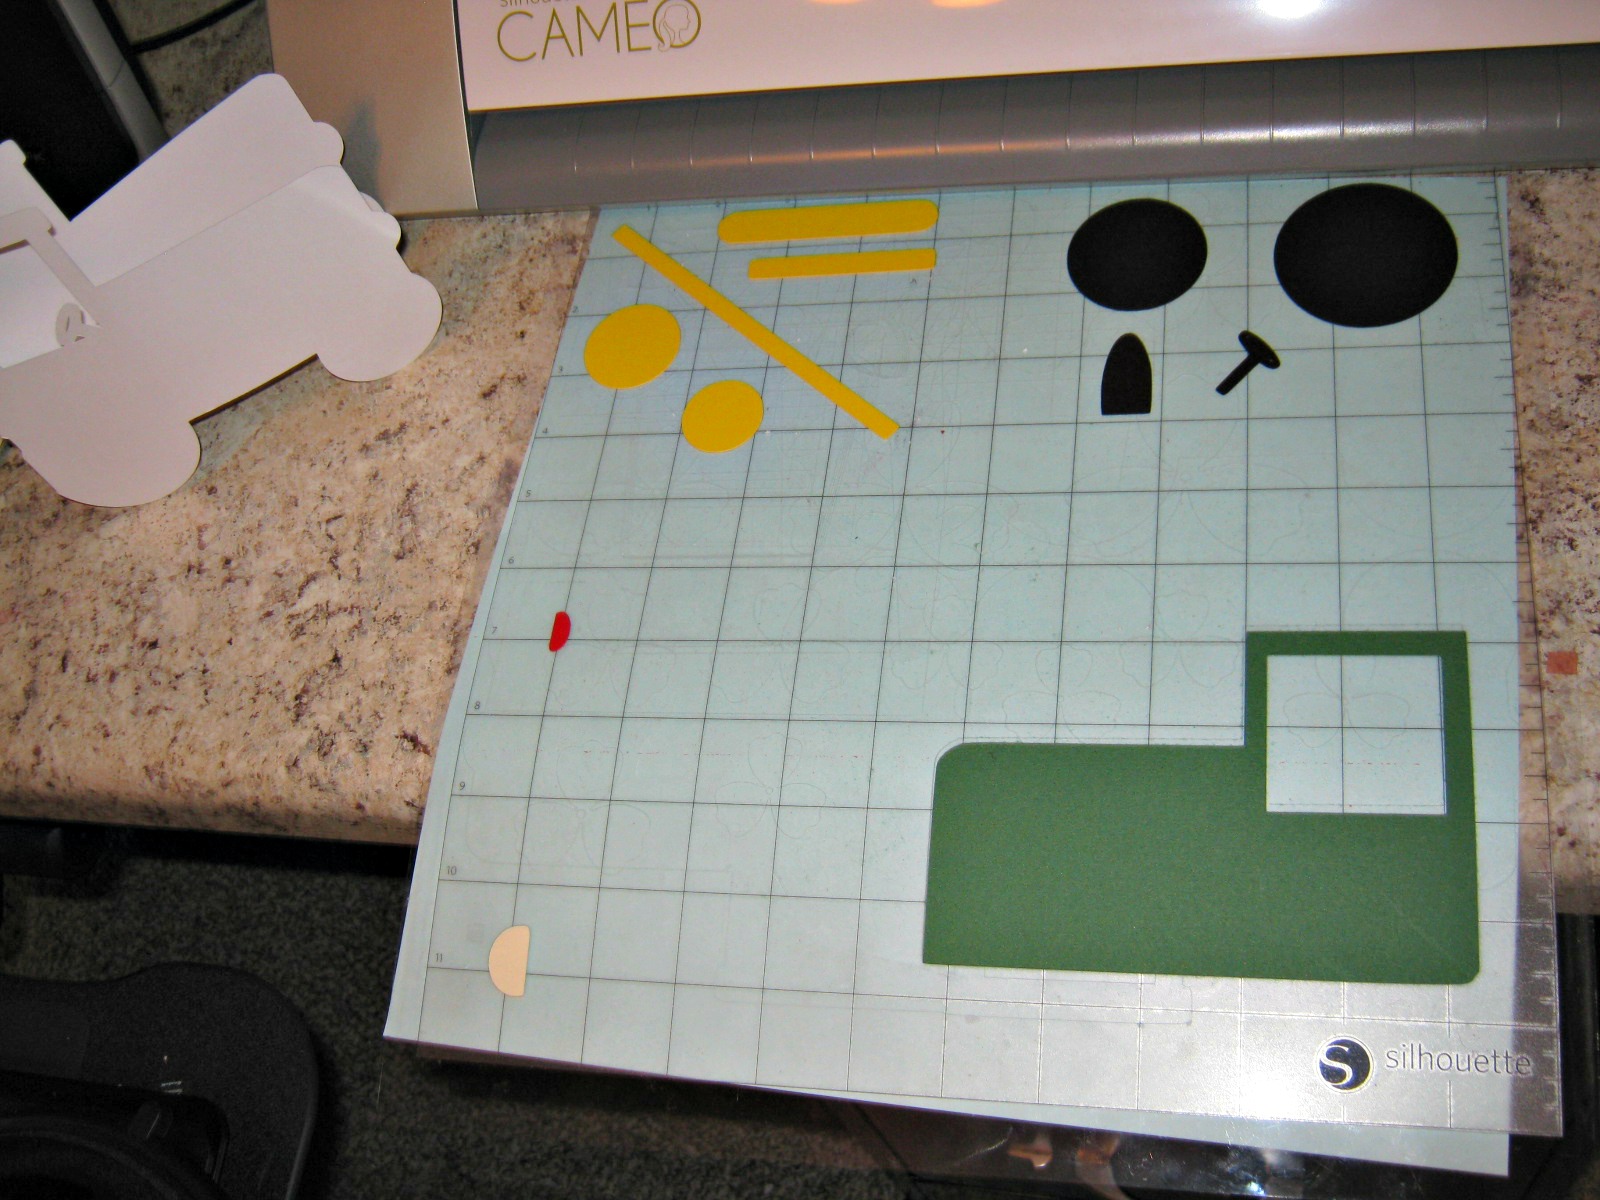
      After re-sizing my tractor file that I purchased for .99 from Silhouette I got the paper ready to be cut for my card.

    Don't ya love it - here it is after it has been cut.  I had already cut my white base with a fold.  I was able to create the base by making a mirror image of part of my file and then welding the images together. I then decided to personalize the tractor and cut the young mans name out with the Silhouette as well.


   After layering all my pieces I just couldn't resist using some Action Wobbles on the wheels.  If you haven't used a Wobble they are a great little addition to a kids card.....they are a small plastic spring that has adhesive on each end. I mounted one under each wheel, just a little flick of the finger and the wheel will 'wobble' around.  Nothing like a little interaction with the card to cheer a four year old up.


    Last but not least, I generated another shape, as well as the sentiment on my Silhouette, sent it to my printer and fed it into the Silhouette to cut.......This will go in the mail tomorrow and he will be in my prayers for many mornings to come.

Supplies:  Silhouette Cameo, Cardstock, Action Wobbles, Xyron Machine

Monday, July 8, 2013

Thank you.....

     Oh yeah, can we just say AGAIN......I am lovin' my Silhouette Cameo.  While playing with my Silhouette today (there is sooooo much to learn) I came across a blog where they have monthly challenges using the Silhouette.  This was just the opportunity I needed to push myself to try something new - faux stitching with my Cameo.  While I have watched many tutorials and knew that I could print and cut, I really didn't fully understand what I could really do with this baby.  Today I drew my own rectangle, filled it with my color choice, did some other fancy schmancy button clicking to add some stitching and made my card background.  Of course the proportions are all to scale since I also cut the dark brown after tracing my original drawing.  Then I loaded a tag that came with my machine, choose a coordinating color to my background and poured it in, did some more fancy schmancy button clicking and created some more faux stitching and then sent this to the printer for printing, loaded it into my Silhouette and cut.  I have to take credit for fussy cutting the boots after I stamped and colored them (Stampin Up can be a little fussy about digitally reproducing their images).  The boots were placed on pop up foam and placed over an image stamped on the card so I wouldn't lose the shadowing of the original stamped image.  Some words were added with a stamp to my tag and my card was finished.
     No it is not a real fancy card......but I am just thrilled with the print and cut option and LOVE the faux stitching affect......I know I will use this more.  Entering this in the challenge at Silhouette Challenges.  

Supplies:  Silhouette Cameo, Stampin Up Wild West, Pop ups, White and Brown Cardstock, Copics

Challenges:  Silhouette Cameo - Faux Stitching, 

Monday, March 11, 2013

Low Cal Birthday Cake

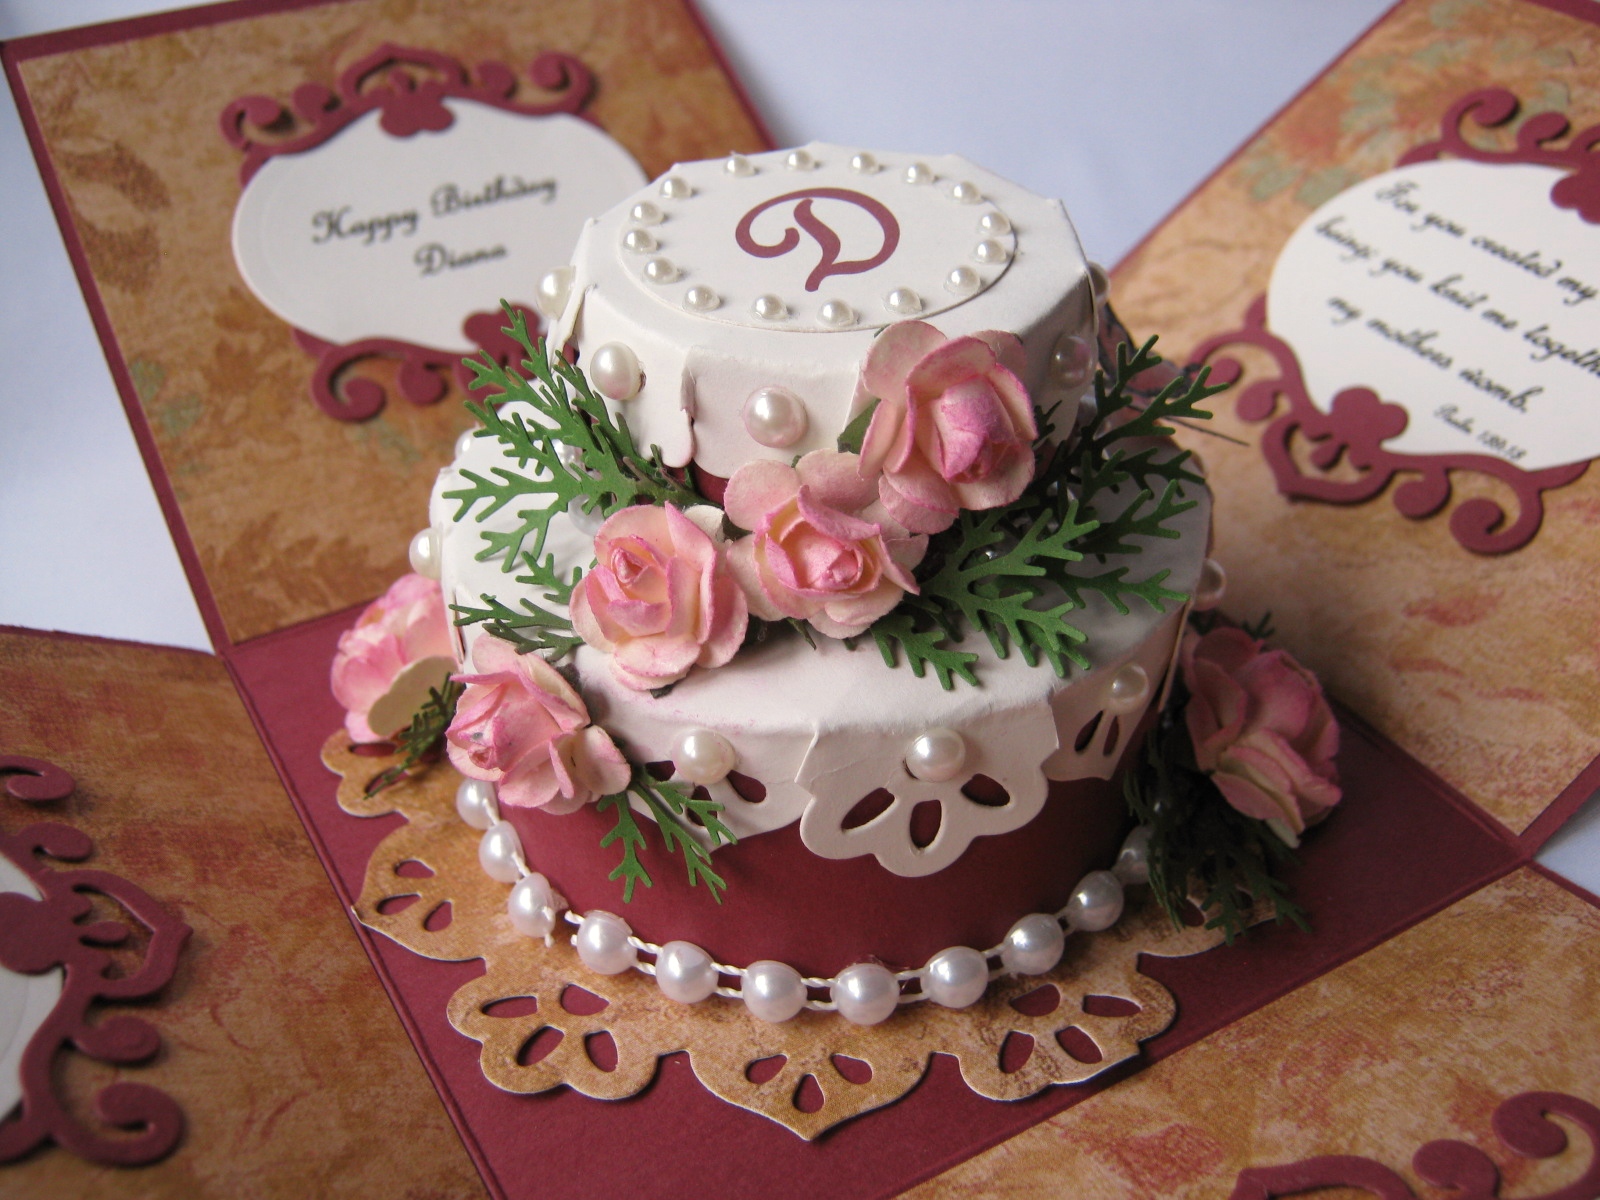
     Had to wait to post this as my friend Diana's birthday wasn't until today.....didn't want to risk her seeing this before it got delivered.  We met during a Bible Study in Missouri - she is also a Weight Watchers leader, with many fine qualities that endear her to me. (There is a tutorial you can click on in my Nav bar  above on how I made the cake using Spellbinder dies) - The explosion box itself is from a 12 x 12 sheet of cardstock scored on each side at 4 inches.

     One panel wishes her a Happy Birthday and the other three contain scripture from the Book of Psalms


The outside of the box contains panels embossed with the corner Butterfly folder, layered on gold paper.


Supplies:  Spellbinders Dies, Martha Stewart Punch, Computer, Digi Sentiment, Recollections Pearls and flowers, Cardstock

Challenges: Stamptacular Sunday Challenge Dies, Oozak Challenge Anything Goes Spring (pushing it but hoping the butterflies and pink flowers qualify :))

Friday, January 18, 2013

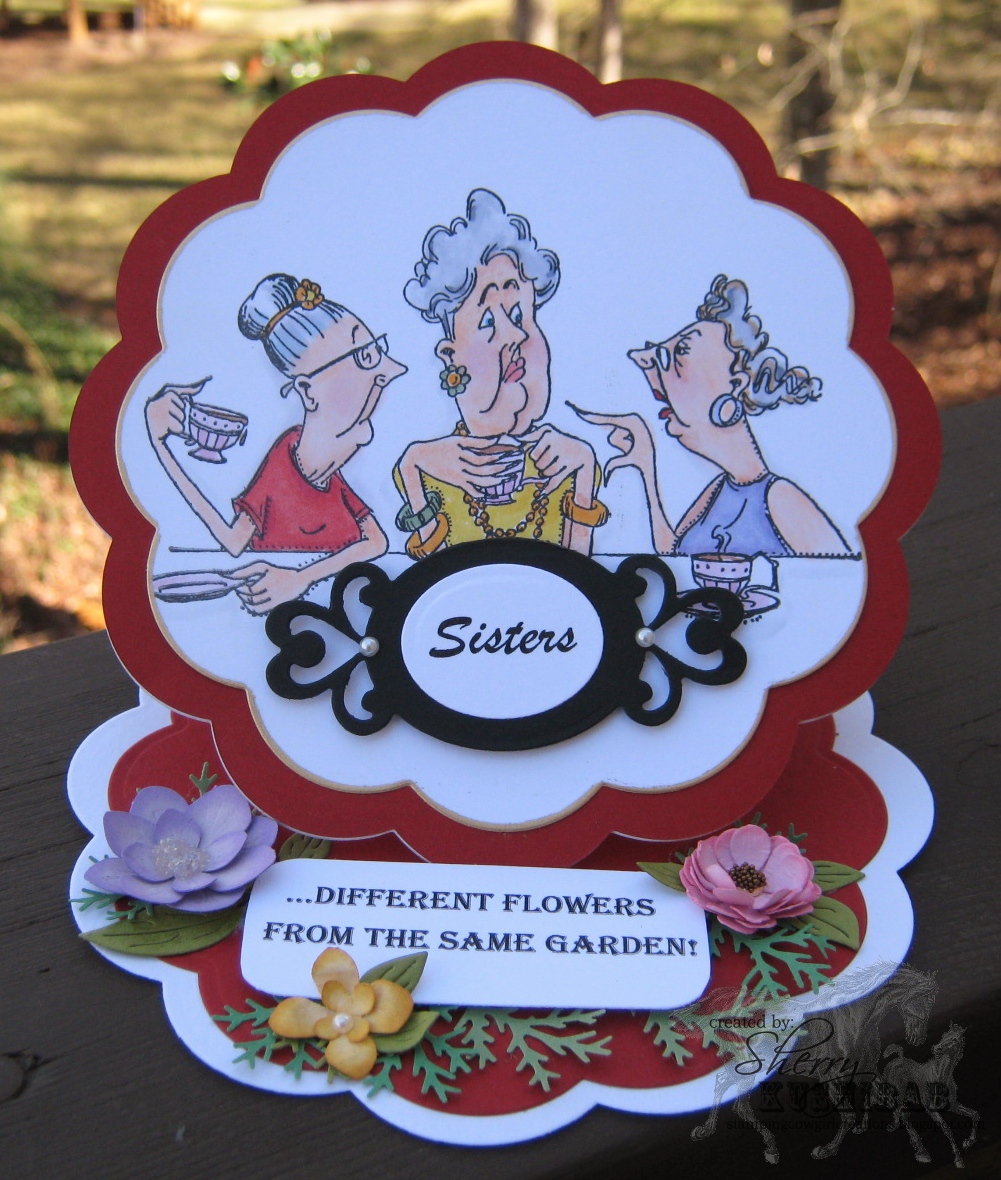
Sisters

     Yes, I am one of those crazies who "Pins" - it can be crazy addicting, but this card is proof that it can be inspiring as well!!  As I hopped from board to board of various "Pinners" I came across the above sentiment.
     I have two sisters, one older, one younger.......I have not lived near them in years but we have always managed to stay in touch and visit.  We have even done several 'sister trips' together over the years as well.  As I was coloring this adorable image by Art Impression a few weeks ago I couldn't help but think of my sisters.  We are sooo different, and yet we are only a phone call (and occasionally a flight) away from each other if the need arises.  I will have to admit that my older sister is known to be the 'control freak' between the three of us - so it is no surprise as I was coloring these ladies I imagined her to be the one with the finger wagging, setting us straight on some matter or another.
    So now you know why when I saw this saying I just HAD to push back from the computer and sit my butt in front of my stamp table and create.  It just seemed natural to make this into an easel card for the sentiment to make sense......the little posies surrounding this are all made by moi :)  (On the bar at the top of my blog is a link to a picture tutorial I have on making some of my flowers)
     I will have to confess I don't know if I have the energy to put another one together, so this may go to the older sister - she is pretty creative herself and always appreciate the cards I send her.

Supplies:  Art Impression Golden Oldies Girls, Spellbinders, Cheery Lynn, Martha Stewart Punch, Copics, Computer


Thursday, January 3, 2013

Jesus 1st Christmas

     I was late getting to Michael' for sales after Christmas....that just happens when you work retail and have to be there for everyone else.  When I finally made it I found a 'few' things left that were good buys.  This sentiment/background stamp was one of them.  It just called to me as I stopped to read what it said.  Into the cart it went.
     My resolve is to get my Christmas cards done earlier this year - Thanksgiving is late and flying by the seat of my pants won't work in 2013.  Since I just finished a few that didn't make it out I feel like I'm already ahead - LOL!!!


     Once I stamped this sentiment/background I realized it looked pretty barren and didn't feel that holly or other embellies would do it justice.  Then I started playing around with it on vellum, a great idea but what do I put under it????  Why the Baby Jesus of course, so I printed off one of my fave Mo's digis and colored this little sweetie with my Copics and I am very pleased.
     My friend Katie suggested I join in the challenge at Splicoast Stampers with the Fan Club SCSCCJAN13 so I am uploading this there as well.  I can say with confidence I now have 3 cards done for 2013 and three ornaments - hope I keep it up.

Supplies:  Stampendous Stamp, Mo's Digital Image, Copics, Vellum, Vellum Tape, Cardstock


Saturday, December 29, 2012

Double Trouble

     This card is for the Teapot Challenge at Splitcoast Stampers.  A lovely couple has been blessed with twins, a boy & a girl - they have been married 19 years and feel blessed by the arrival of these sweet little babies.  I have to admit I don't have tons of baby stamps, but I do have this adorable little boy and girl from Whipper Snapper Designs and love to color them up for cards like this.  Ironically I just made a card using both of them for fun and sent it to the church with some other cards - I just didn't know of anyone to send it to at the time -  LOL!!  Oh well, with that idea still fresh in my head I made another card, and made some changes from the original design.  The baby bottles were made on my Cricut and then layered and shaded with my Copics.  They are mounted with pop ups as is the image itself on the Floral Oval.
     The inside is finished off as well, with a lovely sentiment, mounted with some blue paper in the background, and some sweet little rattles in each corner.  Will get this ready for mailing early next week.
 

Thanks for stopping by:
Supplies:  Whipper Snapper Stamps, Colored Cardstock, Fiskar Rattle Stamp, Sentiment of unknown origin, Copics, Cricut. 

01 09 10